SUMMARY
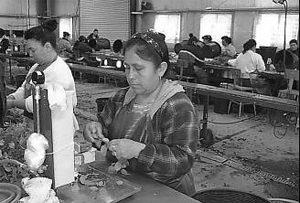
Backaches and pain in the shoulders, arms, and hands are the most common symptoms that farm workers report. These injuries can be disabling, which can affect the worker’s earnings and the grower’s profits.
There are cost-effective ways to prevent or reduce these symptoms. The “tip sheets” in this booklet show how to make or order inexpensive new tools or to modify existing ones to reduce the risk of pain. Solutions discovered for one type of crop can be modified for use with other kinds of crops. Worker-management ergonomics teams can be formed to discover your own simple solutions.
 Oh, my aching back!
What is ergonomics?
Ergonomics rules of thumb Cheryl F. Estill
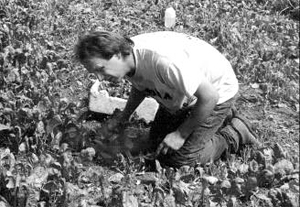
Photo (right) Copyright ©2000 David Bacon
Lifting tool for carrying plant containers
James Meyers, John Miles, Victor Duraj, Julia Faucett, Ira Janowitz, Diana Tejeda, Araceli Suriano, Lynn Bloomberg
Weeding stand for Plant Nurseries
James Meyers, John Miles, Victor Duraj, Diana Tejeda, Julia Faucett, Ira Janowitz, Araceli Suriano
Smaller Picking Tub
James Meyers, John Miles, Victor Duraj, Diana Tejeda, Julia Faucett, Ira Janowitz, Araceli Suriano
A Specialized Harvest Cart for Greens
Bob Meyer, Astrid Newenhouse, Marcia Miquelon, Larry Chapman
Participatory Ergonomics Team
Ninica L. Howard
New Rakes for Harvesting Berries
Cheryl F. Estill, Shiro Tanaka, Deanna K. Wild
Power Cutter for Woody Plants
James Meyers, John Miles, Sayedahmad Shafii, Victor Duraj, Diana Tejeda, Julia Faucett, Ira Janowitz, Araceli Suriano
Metered Liquid Applicator
James Meyers, Victor Duraj, John Miles, Diana Tejeda, Julia Faucett, Ira Janowitz, Araceli Suriano
A Rolling Dibble Marker for Easy Transplant Spacing
Bob Meyer, Astrid Newenhouse, Marcia Miquelon, Larry Chapman
Scraper Handle
Ninica L. Howard
Simple Solutions Are Cost-Effective
Mesh Bags: Easy Batch Processing
Bob Meyer, Astrid Newenhouse, Larry Chapman
Standard Containers
Astrid Newenhouse, Bob Meyer, Larry Chapman
Narrow Pallet System
Bob Meyer, Astrid Newenhouse, Larry Chapman
Packing Shed Layout
Astrid Newenhouse, Bob Meyer, Larry Chapman
Written Materials for Farm Workers
Tips for a Healthy Back
Michael E. Samuels, Eben Howard, E. Roberta Ryder, Joni Berardino, Madge Vásquez, Larisa Ludeke, Linda Lopez
Company Safety Director Testifies: ‘Ergonomics Works!’
Alethea Leandro
Resources: Videos, Pamphlets, Consultation Services
Farm work is hard work, and farm workers feel the results. Farm workers get backaches and pains in the shoulders, arms, and hands more than any other health problem. A third of the injuries that cause them to miss work are sprains and strains, and a quarter are back injuries. These are also the most common causes of disability.
The technical term for these sprains and strains is “work-related musculoskeletal disorders” (WMSDs). WMSDs hurt! They hurt:
In California agriculture alone, the annual workers’ compensation costs for the more than 3,000 back injuries that happen each year may be over $22 million.
This pamphlet is about early intervention to prevent such injuries. It is directed toward growers, safety specialists, human resources managers—anyone with an interest in having safe farms.
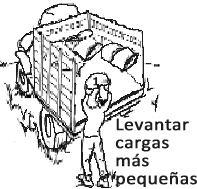
Over the years, many kinds of farm work have not changed much at all. Field work is still done in a stooped position. Workers carry heavy weights in awkward positions, kneel often, work with their arms above shoulder level, or move their hands and wrists repetitively. Sometimes the whole body is subject to vibration from farm equipment. When workers are paid on piece rate, they have a reason to keep up a rapid, sustained pace. Overexertion intensifies all the other risk factors.
Many people in the farm industry may believe that these kinds of tasks—and the resulting sprains and strains—are just an unavoidable part of farm work. But NIOSH (National Institute for Occupational Safety and Health) asked university researchers, specialists in the science of ergonomics, to look into how farm work could be made safer. They worked with growers and employees on different types of farms to come up with some simple, practical, inexpensive solutions. This pamphlet is a result of that hands-on cooperation.
As you read this pamphlet, the specific solutions may or may not apply to your particular operation. But we think you’ll learn three things from it anyway:
The ideas in this pamphlet can be adapted for many types of crops and for different sizes of farm operation.
These suggestions can be adapted for your own farm.
Don’t get discouraged if some solutions seem out of reach. A small tool change or adjustment in the work layout can make a big difference in preventing injuries. Good luck!
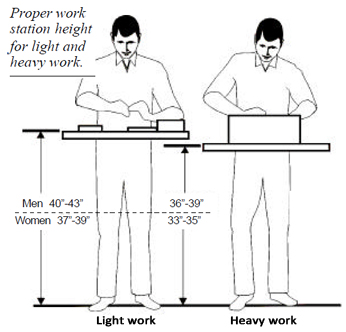
The goal of the science of ergonomics is to find a best fit between worker and job conditions.
 Ergonomics looks at:
in relation to:
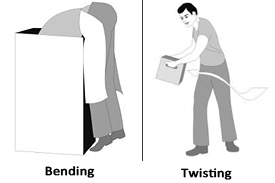
The goal is to make sure workers are uninjured, safe, and comfortable, as well as productive. Work-related musculoskeletal disorders (WMSDs) are:
- forceful gripping - kneeling - lifting - squatting - bending - vibrating equipment - twisting
Ergonomics finds the best fit between worker and job.
The best way to reduce WMSDs is:
redesign the tools & redesign how the work process is done using the principles of ergonomics
Relatively simple changes can make a big difference. When jobs and tools are ergonomically redesigned, you don’t have to rely on a carrot or a stick to get people to work safely. Injuries are prevented as a natural result of improved work posture, reduced force, or less repetition. Ergonomic changes should be put into operation along with worker training on how to work safely.
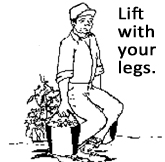
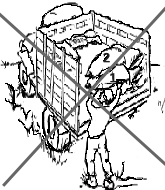
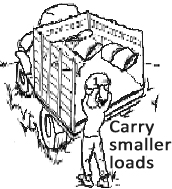
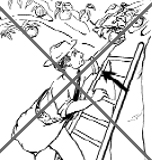
Strains and sprains are caused by excessive reaching, bending, lifting, gripping, squatting, or twisting of hands, shoulders, or body. In general, any work performed with high force, with many repetitions, or in a position that feels awkward is risky. Even a motion that is harmless in and of itself, like stretching out the arm to grasp an object, or squeezing a tool, may put the worker at risk of injury if it is repeated over and over.
Following these guidelines will reduce the chance of sprains and strains. You may need to reposition the work, or redesign the way the job is done, or use a different tool.
Remember: You may not be able to implement all the changes recommended here. But even partial changes or small changes can reduce injuries.
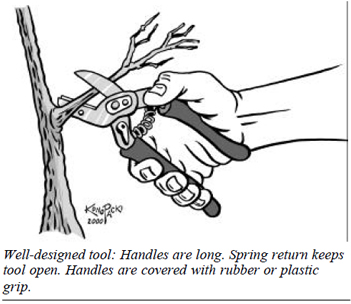
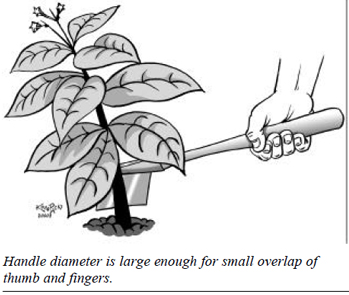
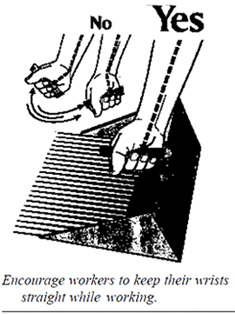
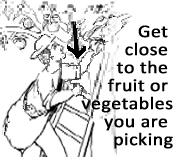
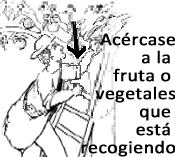
 Guidelines for Hand Work

The following 28 pages show some simple ergonomic solutions that farms have tried out. Some show new or adapted tools that were invented to make work safer or easier. Others show more efficient ways to do the work. Sometimes the solutions reduce the time needed to perform an operation. The basic rule is that the solutions (a) should not cost much in relation to the benefit achieved, and, if possible, should result in quick savings, and (b) should reduce injuries.
As you look through these tip sheets, try not to concentrate on whether they refer directly to your type of crop. Most of the ideas are adaptable for use on many different types of farms. They’re also meant to stimulate your creativity to think up your own simple solutions. Or, as described on pages 17-18, you can get your employees brainstorming about ideas that will work in your operation.
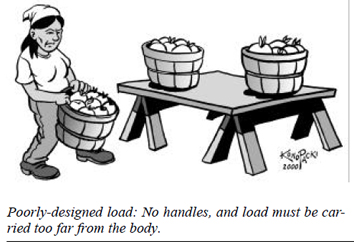
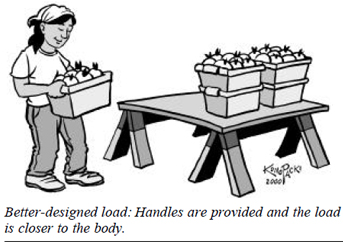
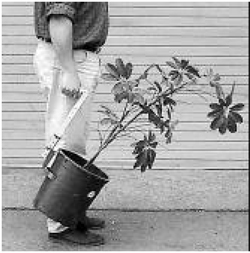
Problem: Lifting and carrying plant containers by hand can cause injuries.
One Solution: Use specially designed handles to pick up and carry containers.
Tips for Use of Tool:
The tool is designed to allow the container to swing back and hang at a comfortable angle. Do not apply excessive wrist torque when setting container down onto a surface. Instead, allow space for a gentle forward swing that is timed with placement of the container on the surface. The back-grip design keeps hands clear of thorns on certain types of plants and allows for a straight wrist position while carrying a container. It is advisable to use two tools and carry two plants, to balance the load on the body. Avoid carrying containers heavier than about 22 pounds in each hand; this would exceed guidelines for safe lifting.
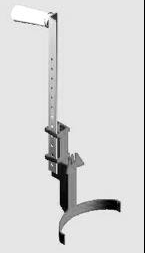
The tool has three parts: a) the hand-grip, b) the container coupling, and c) the 16-inch extension. It is made of aluminum and steel and has proven to work best with 5-gallon containers that have an external lip. From a standing position the worker slides the coupling point under the container’s lip and lifts.
The tool shown here was designed for use in outdoor nurseries specializing in ornamental and bedding plants. At nurseries in California where it was tested, it reduced workers’ forward bending angle by as much as 47%. The time spent working at a forward-bent angle of more than 20 degrees was reduced by nearly half. Hand gripping effort was reduced by more than half. Lifting strain was reduced by 40%. Workers reported less work-related pain when using the handles, and those who had the most severe symptoms at the start reported the most improvement.
Materials should cost about $15 each plus the cost of fabrication, whether done in-house or jobbed out.
Use of the handle resulted in the same or slightly improved productivity for ground-to-ground container spacing, its recommended use.
Note: Steel may be substituted for aluminum for cost or fabrication reasons, but steel will increase the tool’s weight from its current 1-3/4 pounds.
This Tip Sheet was produced by the University of California Agricultural Ergonomics Research Center under a grant from the National Institute for Occupational Safety and Health.
UC Ag Ergonomics Research Center, Bio & Ag Engineering, UC Davis, One Shields Avenue, Davis, CA 95616-5294. Or visit http://ag-ergo.ucdavis.edu.
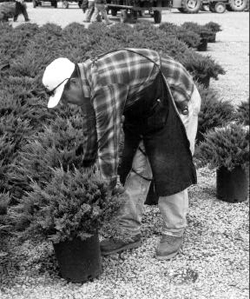
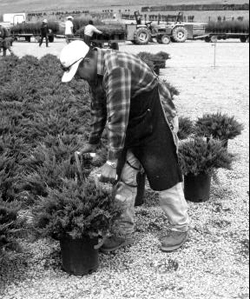
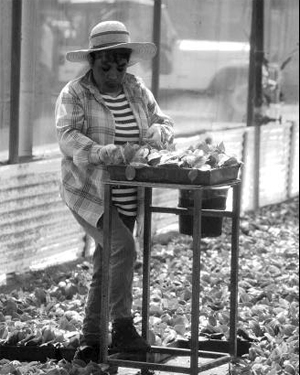
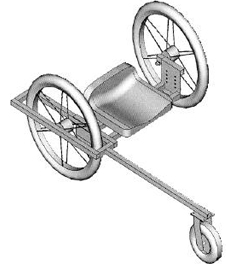
Problem: When plants are kept on the ground, workers must bend completely forward to weed them, risking low-back problems.
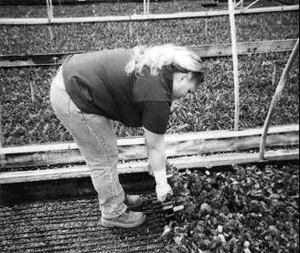
One Solution: Use a movable table to elevate trays while weeding.
You can help prevent chronic back injuries among weeders and should see improved work quality.
Probably not, if you calculate productivity over the work shift. Use of the table may result in slightly slower progress while workers are fresh. By midday, however, when back fatigue is setting in, workers using the table will be less tired and likely to move faster.
Either approach is fine provided that the table is the right size to fit the workers. As pictured, the ideal table will give workers a platform for the trays at just above their waist height. It should be light enough to move easily, but sturdy enough to be stable in use.
The weeding table is still a good investment. Lots of nursery tasks other than weeding involve stooped posture. Relief, even in a part-time job, will help prevent long-term injury and will improve worker performance.
With simple materials from your facility’s shop or a home improvement store. The recommended material is light-duty steel, which will hold up under wet conditions, will not be too heavy to move around, and can be welded with typical shop equipment.
The drawing on this page shows 3/4”x 3/4” x 1/8” angle iron used for the table’s legs, bottom bracing, and top bracing. The tabletop could be a piece of metal grating welded to the frame in a number of spots or a metal plate welded or bolted to the top. Cost for materials would be about $25.
Another possibility would be to make the table of aluminum, which is lighter in weight, and bolt the parts together rather than welding them. This would require a hacksaw, drill motor, wrenches, and some additional diagonal bracing. In any case, the key elements of the stand are height and portability.
An existing table could be retrofitted, if you have access to a shop and a welder. Two of the legs could be shortened and fitted with a steel rod, two lawnmower wheels (about $7.50 each), and push-on retaining caps, all of which are available at hardware stores.
A collapsible four-wheeled table is available ready-made for $227.99. This table has a push handle and is 24” long x 19-3/4” wide x 30” high. Contact, for example, Materials Handling Equipment, 7433 US 30 East, Fort Wayne, IN 46803. 219-749-0475. http://63.87.5.30/ mhec/catalog.shtml Contact Information: This Tip Sheet was produced by the University of California Agricultural Ergonomics Research Center under a grant from the National Institute for Occupational Safety and Health. UC Ag Ergonomics Research Center, Bio & Ag Engineering, UC Davis, One Shields Avenue, Davis, CA 95616-5294. Or visit http://ag-ergo.ucdavis.edu.
This Tip Sheet was produced by the University of California Agricultural Ergonomics Research Center under a grant from the National Institute for Occupational Safety and Health. UC Ag Ergonomics Research Center, Bio & Ag Engineering, UC Davis, One Shields Avenue, Davis, CA 95616-5294. Or visit http://ag-ergo.ucdavis.edu.
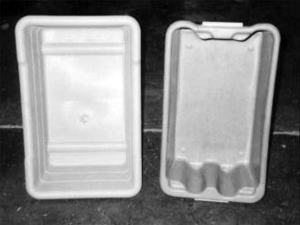
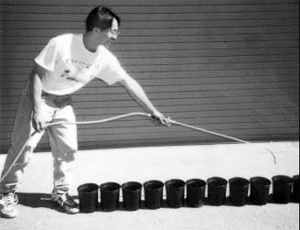
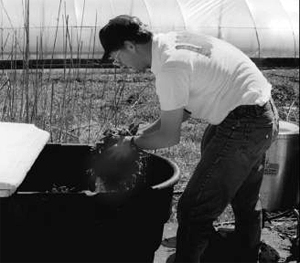
Problem: In hand harvest of wine grapes, the tubs used are heavy when full and, thus, can contribute to back and knee injuries.
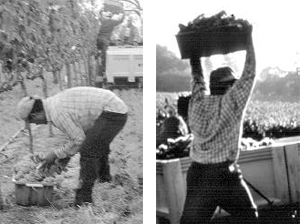
One Solution: Use a smaller, lighter tub (on the right) that has add-on grips and weighs an average 46 pounds when full.
The smaller tub was tested at several vineyards in a NIOSH-funded ergonomics study in California’s Napa and Sonoma counties.
After the harvest season, workers reported pain and symptoms of injury that were only one-fifth of what they were with the large tub. Reduction of pain symptoms indicates a lower risk for future chronic injury or cumulative trauma disorder such as nagging back or joint pain.
Only negligibly. In a three-year field trial, the smaller tub resulted in a 2% reduction in pounds of grapes delivered to the gondola per day. Neither managers nor workers perceived the reduction in the field.
The reduction in productivity was not as much as might be expected, given that the two tubs are significantly different in size. This was apparently because workers using the small tub were less tired throughout the day and made 20 more carries per shift.
Despite making more carries, workers using the small tubs used less energy and had lower heart rates. They liked the smaller tubs better, reporting that they were less tired at day’s end.
Here is the best “proof” that the smaller tub is better for workers: Workers on piece rate, who usually are eager for maximum productivity, preferred the smaller tub.
The tub used in the study was a LEWISystems SN2414-8 stack/nest tub by Menasha Corporation of Watertown, Wisconsin, 800-558- 9563. Cost is about $13 each.
The SN2414-8 is two inches narrower and over two pounds lighter than the old tub. Ask your existing supplier for a smaller tub that is similar to the one used in the study; you may find good alternatives.
The add-on grips are simple to make using 1/2” PVC pipe (Schedule 40), a saw (preferably a band saw), and a jig such as suggested in the diagram below. The jig will cost about $75 to have made.
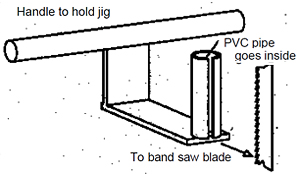
Cut the PVC pipe to 5” lengths and cut an approximately 1/32”-wide slit lengthwise in the PVC using the jig. Use a slotted screwdriver to help slide the PVC over the edge of the tub’s existing grip.
This Tip Sheet was produced by the University of California Agricultural Ergonomics Research Center under a grant from the National Institute for Occupational Safety and Health.
UC Ag Ergonomics Research Center, Bio & Ag Engineering, UC Davis, One Shields Avenue, Davis, CA 95616-5294. Or visit http://ag-ergo.ucdavis.edu.
Stooping or kneeling and crawling to harvest salad greens requires a lot of time and energy. Lifting and moving your harvest container many times as you fill it adds to the work load. An alternative is to build a simple cart, which allows you to sit and roll while you harvest. This is less tiring for the knees, back, hamstrings, and torso. The cart also holds your harvest container, so it rolls along with you.
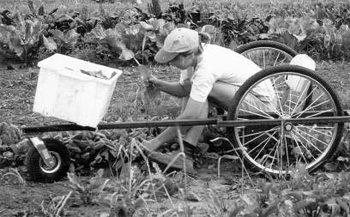
The cart straddles the crop bed or rows, so that the wheels are on the paths between the beds. A seat is mounted low to the ground, between the rear wheels, allowing you to work directly over the bed without stooping. The seat swivels so you can harvest all parts of the bed without twisting your body. A sternum pad supports your torso so you can lean forward and ease strain on your lower back. Move the cart forward by pushing the rear wheels with your hands, wheelchair fashion, or scoot along with your feet on the ground. Prop your harvest container on the front corner of the cart frame, within easy reach. The front wheel swivels for easy steering.
Less fatigue and discomfort. Prolonged kneeling to harvest, transplant, or weed puts smallscale growers in one of the highest risk groups for occupational injuries. Harvesting from a seated position eliminates knee strain and is less tiring for the back, hamstrings, and torso. Kneeling requires at least 25% more energy and stooping requires at least 45% more energy than sitting does.
| Harvest Speed and Posture Analysis | Without Cart | With Cart |
|---|---|---|
| Avg. harvest speed (mins/3lb crate) | 7.8 | 4.6 |
| % time spent in unacceptable postures | 46 | 0 |
| % time spent in marginal postures | 48 | 93 |
| % time spent in acceptable postures | 6 | 7 |
| This data is based on a case study with the same worker performing the same task. Postural analysis was compiled using the Ovaco Work Analysis System. | ||
Faster. Using the cart lets you harvest the same amount of greens 40% more quickly. Faster harvesting and quicker time to the cooler maintains high crop quality.
Less soil compaction. Instead of kneeling or walking in the crop row or bed, the cart supports your weight. Your weight, plus the weight of the cart, is transferred through the wheels to the paths between the crops.
Improves profits. Cutting harvest time can save labor costs. A typical scenario might be that your labor costs are $7.00 per hour, and you harvest four days a week. If you save 30 minutes per harvest day by using the cart, in 11-18 weeks the cart will have paid for itself. If the harvest cart prevents back or knee pain, you might also save money on medical bills.
 Where Can I Get a Specialized Harvest Cart?
 These carts, designed by Bob Meyer and Hal Bohne of the University of Wisconsin Agricultural Engineering Lab, are not available in stores or catalogs. We can provide plans for you to make your own cart from readily available materials. Some welding is required, which can easily be done by your local welder. Locate a welding shop in the phone book under welding-custom fabrication. Buy the parts at a hardware store or from a tool and equipment catalog such as: Northern Hydraulic, P.O. Box 1499, Burnsville, MN 55337. 800-533-5545. (This reference is provided as a convenience for our readers. It is not an endorsement by the University of Wisconsin.)
The parts for this cart cost about $150. Labor costs, custom welding, or welding shop rental times will vary.
Steel: (1 1/4” square tubing, 1/8” wall thickness. 3/32” flat stock for gussets and supports) $ 15
Seat: (small tractor replacement) $ 28
Rear Wheels: (26” pneumatic) $ 28/ea.
Front Wheel: (10” swivel caster) $ 36
Swivel: (boat seat) $ 15
Total $150
Cart width should be 6”-12” wider than beds so that wheels will roll in the paths. Overall cart length is 42 1/2”.
This material was developed by the Healthy Farmers, Healthy Profits Project, whose goal is to find and share work efficiency tips that maintain farmers’ health and safety and also increase profits. For more information, visit our web site at http://bse.wisc.edu/hfhp/ or call 608-265-9451. Healthy Farmers, Healthy Profits Project, Department of Biological Systems Engineering, College of Agricultural and Life Sciences, University of Wisconsin, 460 Henry Hall, Madison, WI 53706. Feel free to reproduce; please mention source.
Problem: Management and workers want to decrease injuries, but lack knowledge of ergonomics. Instructions on safe practices from outside experts in ergonomics or from management may fall on deaf ears.

One Solution: Set up a joint ergonomics team of workers and managers.

The participatory approach—involving workers and managers—produces the best ideas for preventing injuries. It also means that the ideas will be used, rather than collecting dust on the shelf. The participatory approach recognizes workers’ knowledge and uses it both to single out the worst hazards and to develop solutions. Workers are in on the decisions about which jobs to improve, and how to improve them. They spread the knowledge of ergonomics and of the specific solutions to the rest of the work force.
Keep the size of the team small. Involve production workers and supervisors from the different departments— the people who will put the job improvements into use—and also the maintenance workers or engineers who will build the needed tools. Include a representative from each major type of job. It is important that the person who has decision-making power to implement the team’s recommendations also be a team member.
Hold training and meetings during work hours; participation should be seen as part of the job, not an extracurricular activity. Hold training and meetings in the workers’ first language. Sometimes this will mean using two languages, with translation.
Workers’ and managers’ time spent working on the team should be paid at their regular rate. New tools may have to be ordered or built. Reduced costs because of decreased injuries should outweigh these short-term costs.
See the Resources section for a video, Ergonomic Programs That Work, and a pamphlet, Elements of Ergonomics Programs.
Look in the Resources section for a list of free OSHA consultation services (there is one in each state).
This Tip Sheet was produced from material developed by the Safety and Health Assessment and Research for Prevention (SHARP) Program, Washington State Department of Labor and Industries. SHARP, Washington State Department of Labor and Industries, PO Box 44330, Olympia, WA 98504-4330. Or visit http://www.wa.gov/lni/sharp/.
Problem: Harvesting blueberries with a traditional rake is hard on the body.
Two Solutions:
 Because wild blueberries grow only about eight inches from the ground, harvest workers rake in a very stooped position. Their short-handled steel or aluminum rake, costing about $60, causes the wrist to flex as the rake is dragged through the berries. To help guide the rake, most workers hold on to its side, using a pinch grip, which can cause tendinitis in the hands. The rake handle is too thin, at 1¼ inches in diameter, for most people to use comfortably.
Acadian Machine Works Ltd. Tignish, Prince Edward Island C0B 2B0 Canada 902-882-2349 Cost: $550 Canadian or about $300 U.S., plus shipping
This rake rolls on two wheels, making it easy to push through the bushes.
Some workers have also made homemade stand-up rakes, by attaching a long handle to a traditional rake, via a frame around the back and a cylindrical roller (like a rolling pin) attached to the bottom. Such homemade roller rakes are heavy, but still easier on the back than the traditional rake.
At a cost of $300, it would take 17 to 30 hours for a blueberry harvester to pay for a manufactured standup rake. The rake should be sturdy enough to last for many seasons.
This Tip Sheet was produced by NIOSH. NIOSH, 4676 Columbia Parkway, Cincinnati, OH 45226. Or visit http://www.cdc.gov/niosh.
Problem: Thick woody plants are difficult to cut with small propagation shears. Repetitive gripping can contribute to chronic problems in the hand, wrist, and arm.
One Solution: Use a bench-mounted power cutter to relieve repetitive gripping and speed the work.
The cutter uses air pressure to power a pneumatic cylinder that closes and opens a set of mounted hand shears, which have been modified for this purpose. Each cycle is activated by a light touch of the plant material against the trigger lever of an air micro-switch.
The cutting quality is unchanged, because the blades are identical to those of current hand shears. Workers new to the powered cutter will need one to two hours of practice before they can use it as well as the hand shears.
Reducing fatigue may increase productivity over the course of the day. Also, workers with physical limitations may be able to use the machine much more easily than the hand shears, and thus be more productive.
Contact: MG Enterprises Rocky Canyon Road Creston, CA 93432 Prices will likely run about $1,000 for a smaller cutter and $1,250 for a larger one.
This Tip Sheet was produced by the University of California Agricultural Ergonomics Research Center under a grant from the National Institute for Occupational Safety and Health. UC Ag Ergonomics Research Center, Bio & Ag Engineering, UC Davis, One Shields Avenue, Davis, CA 95616-5294. Or visit http://ag-ergo.ucdavis.edu.
Problem: Manual application of liquids (such as growth regulators) with a spray-wand can cause worker injury, as well as waste of chemicals and plant loss.
One Solution: Use a semi-automated, metered liquid applicator to provide a precise dose to each plant and to eliminate repetitive hand closure.
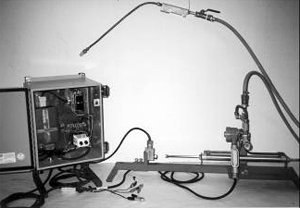
The system has three parts: a) the electric controls box, b) the metering cylinder assembly, and c) the check valve-fitted spray-wand. It uses a tractor’s 12-volt battery to power the timer module and to create 120-volt electricity that powers the solenoid valve. Liquid is alternately supplied to each side of the double-acting cylinder, which meters a precise dose through the discharge hose. An adjustable momentary delay provides time between discharges to move the wand to the next plant. A spring-loaded check valve at the end of the spray wand ensures that excess liquid does not flow out of the spray gun between discharges.
The applicator is composed of off-the-shelf components with the exception of a steel frame. It requires a qualified electrician for wiring and assembly of the electrical components. Material costs should be about $500.
Caution! Proper assembly of the liquid applicator requires specific expertise. Consult a trained electrician or engineer for advice and assistance. The assembled liquid applicator should be tested initially using potable water, not chemicals.
The electric controls box houses the power converter, ground fault interrupter, system toggle switch, terminal strip, fuses, and timer module.
The cylinder metering assembly consists of a steel frame with a double-acting double-rod cylinder, an adjustable stop for the cylinder, an air purging valve, and a solenoid valve with inlet/outlet hose adapters.
The spray gun can be any pistol-style wand, or one modified to pistol style, to allow for a neutral wrist position with an outstretched arm.
For a free parts list and detailed instructions on how to make the metered applicator, write to:
UC Ag Ergonomics Research Center Bio & Ag Engineering, UC Davis One Shields Avenue Davis, CA 95616-5294
Or visit http://ag-ergo.ucdavis.edu.
Trapped air in the solenoid valve, tubing, cylinder, or hose will affect the accuracy of the system. To help avoid this problem, the cylinder ports face upward, and the 4-way valve is located directly above the cylinder. A bypass valve for purging air from the hose is provided. Rough handling of the discharge hose can cause unwanted discharge. Handle the hose relatively gently unless the spray-wand valve is closed. For more information about this system, please visit the UC-AERC web site at http://ag-ergo.ucdavis.edu.
This Tip Sheet was produced by the University of California Agricultural Ergonomics Research Center under a grant from the National Institute for Occupational Safety and Health. UC Ag Ergonomics Research Center, Bio & Ag Engineering, UC Davis, One Shields Avenue, Davis, CA 95616-5294.
Or visit http://ag-ergo.ucdavis.edu.
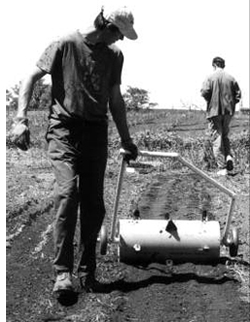
Hand transplanting seedlings into the field can be tedious and time-consuming. Some growers lay a tape measure or knotted string on the planting bed to space transplants evenly. Others just estimate plant spacing with their eyes. Many growers then use a hand trowel to dig holes for the transplants. A rolling dibble marker, or dibble drum, is a tool that helps you transplant seedlings faster and more accurately. The handpulled tool rolls across the planting bed, punching or scooping transplant holes into the soil at regular intervals.
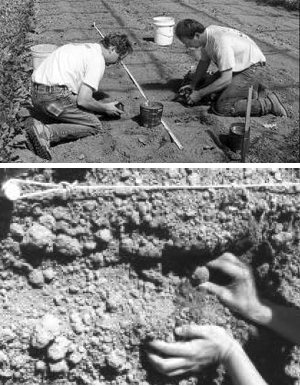
Traditional transplanting often uses a measuring
stick (above) or a knotted string (below) to space plants.
You walk down the path beside the prepared planting bed, pulling the dibble drum behind you by its handle. As it rolls along, “dibbles,” or scoops, which are screwed into a PVC drum at regular intervals, create indentations in the soil for transplants.
In loose soil, the dibble drum will dig holes, but in heavy or compact soil it will mark locations for transplant holes. After rolling the dibble drum along your planting bed, plant transplants into the holes or scoop marked holes with a trowel.
 Why Use a Dibble Drum?
 Saves time. You can set out, plant, and water transplants 24% faster when using a dibble drum to space and dig holes, compared to visually estimating spacing and using a trowel.
More accurate. If you mark your planting bed with a dibble drum, you will ensure exact spacing of your transplants in a grid pattern, even when the task is performed by inexperienced workers. Consistent spacing makes weeding easier, since you can use a hand hoe or wheel hoe in two directions or use a mechanical cultivator. Accurate plant spacing will conserve bed space and maintain plant quality. Even experienced growers tend to overestimate plant spacing, which can waste productive land. If growers underestimate spacing, plants can be crowded and yield might suffer.
Easier on the body. Using a dibble drum to space transplants lets you stand instead of stooping or kneeling to mark transplant spacing.
Simple. It can be complicated and time-consuming to explain how to space transplants to inexperienced field hands. With a dibble drum, you can instruct workers to simply roll the drum down the planting bed and set one plant in each hole.
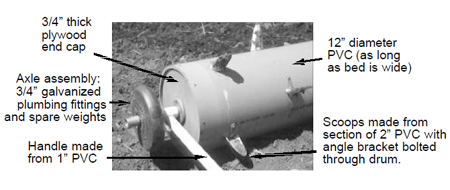
This rolling dibble marker, designed by Bob Meyer of the University of Wisconsin Ag Engineering Lab, is made from readily available hardware, lumber, and PVC pipe. The drum is a section of 12” diameter PVC pipe ($45-$50) commonly used for sewer connections. Check with plumbing supply stores and ask for a section as long as your bed is wide. Parts for the dibble drum will total approximately $100.
(1) 12” diameter PVC pipe cut to length of bed width.
(1) 2”x18” PVC pipe cut into (6) 3” sections which are each cut in half lengthwise at a 45º angle.
(12) 2” metal angle brackets, fastened to each scoop and then to the PVC drum.
(2) 1’x1’x3/4” plywood pieces, cut to fit end of drum and fastened with screws.
(2) 3/4” floor flange, screwed into center of plywood.
(2) 3/4”x6” nipple threaded through PVC handle “T” and screwed into flange.
(2) 3/4” coupler or end cap.
(1) 1”x10’ PVC pipe, cut into 4 sections (42”, 24”, 25”, 13”).
(2) 1” PVC “T”, to slip over each axle.
(1) 1” PVC 90º elbow to connect the 13” handle section to the 42” section.
(2) 1” PVC 45º elbow.
Glue the 42” section and 24” section each into an axle “T”. Glue a 90º elbow to the 42” section and a 45º elbow to the 24” section. Glue the 13” section to the 25” section with a 45º elbow. Attach the other end of the 13” section to the 90º elbow, and the other end of the 25” section to the other 45º elbow.
(48) 1/4”x1” machine screws, (56) 1/4” lock washers, (56) 1/4” nuts, (16) 1/4”x1” wood screws, (8) 1/4”x2” pan head machine screws.
PVC glue.
Exterior wood varnish or paint.
This material was developed by the Healthy Farmers, Healthy Profits Project, whose goal is to find and share work efficiency tips that maintain farmers’ health and safety and also increase profits. For more information, visit our web site at http://bse.wisc.edu/hfhp/ or call 608-265-9451.
Healthy Farmers, Healthy Profits Project, Department of Biological Systems Engineering, College of Agricultural and Life Sciences, University of Wisconsin, 460 Henry Hall, Madison, WI 53706.
Feel free to reproduce; please mention source.
Problem: Long-handled metal floor scraper (used for cleaning up dirt and mud) requires lots of force to grip and to push.
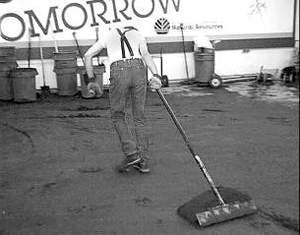
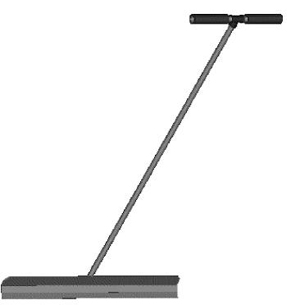
One Solution: Attach an eight-inch bar handle to top of scraper.
Dirt and mud packed on the floor of a work area can be thick and heavy. It’s hard to hold the handle tightly enough to push as hard as you need to. If workers lean into the scraper to use the whole force of their bodies, it hurts when the end of the shaft jabs into their stomachs.
You can use two hollow pipes (four- or five-inch-length nipples), attached to the shaft with a pipe T fitting, or you can weld an eight-inch length of pipe nipple directly to the shaft. If the original shaft is made of wood, this will mean replacing it with pipe as well. Use a ¾- inch pipe shaft. Being hollow, the pipes will not make the scraper overly heavy. Then wrap the nipples with foam pipe insulation to cushion the handle.
This Tip Sheet was produced from material developed by the Safety and Health Assessment and Research for Prevention (SHARP) Program, Washington State Department of Labor and Industries. SHARP, Washington State Department of Labor and Industries, PO Box 44330, Olympia, WA 98504-4330.
Or visit http://www.wa.gov/lni/sharp/.
The next four tip sheets were written for small fresh-market vegetable farms, where produce is sold without processing, directly to stores, restaurants, or consumers. For these four items, researchers from the University of Wisconsin Biological Systems Engineering Department made estimates of costs, profit improvements, and work hours affected. As you can see, each improvement gives a lot of bang for the buck.
| Innovation | Percent of Work Force Affected |
Percent of Work Hours Affected |
Possibility for Profit Improvement |
Start-Up Cost |
|---|---|---|---|---|
| Net bag wash system | 60% | 10-20% | High | $24 (six bags) |
| Standard containers | 75-95% | 10-20% | Medium-high | $120 (12 containers) |
| Pallets and hand truck |
80% | 20-50% | High to very high | $750 (75 pallets & truck) |
| Packing line layout | 75-95% | 15-25% | Low to medium | $150-$400 |
| SOURCE: All data are best estimates based on field observations and professional judgement of project staff. | ||||
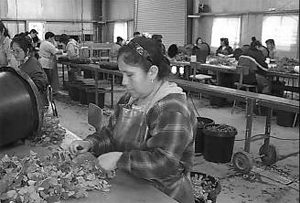
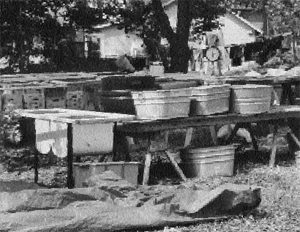
Problem: Washing leafy greens by hand is backbreaking and time-consuming.
One Solution: Use mesh bags to speed the process.
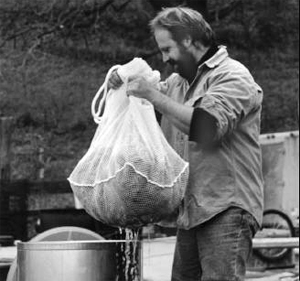
A mesh bag is a woven or knotted polyester or nylon sack that lines your harvest containers or wash basins. When you need to wash a large number of small items (such as salad greens, peas, beans), a mesh bag can save you time and help reduce stress and strain on your body.
You can move a large amount of produce at one time through the harvest, washing, and drying process. This amount, or batch, allows you to speed the entire process because you cut out many short repetitions along the way. For example, you can line your harvest container with a mesh bag, then lift the entire bag and its contents into the wash basin. Leave the produce in the bag to soak and rinse, and then lift the entire batch to dry. Dry light produce by placing the bag into a commercial salad spinner, or use an old washing machine set to “spin” cycle. The mesh allows water to drain out. If you don’t have a spinner or washing machine to dry produce, spin the bag lasso-style in the air.
Mesh bags cost approximately $2-$5 apiece, and the time savings from batch processing with a mesh bag will increase your profit. You can lift 50% more produce by weight with a mesh bag compared to by hand without a bag. Indirect savings will occur from preventing stress and strain on your body. Produce quality is improved with faster washing and drying, and produce loss from repeated handling is also prevented.
Several companies sell mesh bags for various uses such as laundry bags and storage bags. Check ads in magazines such as the American Vegetable Grower, Growing for Market, and The Packer. The Nylon Net Company sells a 22”x22” square bag with 1/4” mesh.
Cady Industries sells 32”x27” knotted McKnit bags. These sources are provided as a convenience for our readers. They are not an endorsement by the University of Wisconsin-Extension, nor is the list exhaustive.
Cady Industries
P.O. Box 2087
Memphis, TN 38101
800-622-3695
Nylon Net Co.
845 North Main St.
Memphis, TN 38107
800-238-7529
This material was developed by the Healthy Farmers, Healthy Profits Project, whose goal is to find and share work efficiency tips that maintain farmers’ health and safety and also increase profits. For more information, visit our web site at http://bse.wisc.edu/hfhp/ or call 608-265-9451. Healthy Farmers, Healthy Profits Project, Department of Biological Systems Engineering, College of Agricultural and Life Sciences, University of Wisconsin, 460 Henry Hall, Madison, WI 53706.
Feel free to reproduce; please mention source.
Problem: Non-uniform containers are difficult to use.
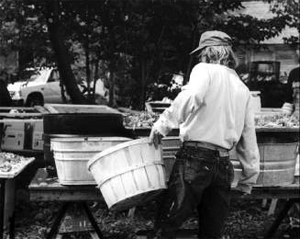
One Solution: Standardized containers for your produce.
Standard containers cost about $5-$10 apiece.
Their durability, versatility, and ease of use may save you money in the long run. More efficient work using standard containers—compared to using assorted baskets, boxes, crates, and pails—may produce indirect savings. These would include faster harvest and handling, less stress and strain on your body, and easier monitoring of crop yield. You can save field time by tossing empty containers to strategic places along the harvest row.
Standard containers can be used to wash and drain produce as well as for transport. Some have rounded bottoms so they can be used as “sleds” in the field or used as wash basins in the packing shed. Standard containers made of plastic polymers will last for many years.
Standard containers nest to save storage space. You can help prevent the spread of plant diseases by regularly washing plastic containers. Be sure to sanitize all surfaces of the containers, both inside and out. Containers should not be stacked on soil to dry, nor should you stack cleaned containers if they have been in contact with soil. Containers that fit the size and weight of your produce may improve harvested crop quality, since less loss will occur from damage.
Standard containers can be stacked on narrow pallets or full-sized pallets and then entire pallet loads can be moved with a hand truck or hydraulic pallet jack.
A number of companies sell standard containers. Check ads in magazines such as the American Vegetable Grower, Growing for Market, and The Packer for sources. The following list of companies is provided as a convenience for our readers. It is not an endorsement by the University of Wisconsin-Extension, nor is it exhaustive.
Buckhorn Inc.
55 W. TechneCenter Dr.
Milford, OH 45150
800-543-4454
CSA Works
121 Bay Rd.
Hadley, MA 01035
413-586-5133
recycled containers; bulk orders for small- and medium-sized growers
Perstorp Xytec, Inc.
9350 47th Avenue SW
Tacoma, WA 98499
800-423-3221
This material was developed by the Healthy Farmers, Healthy Profits Project, whose goal is to find and share work efficiency tips that maintain farmers’ health and safety and also increase profits. For more information, visit our web site at http://bse.wisc.edu/hfhp/ or call 608-265-9451.
Healthy Farmers, Healthy Profits Project, Department of Biological Systems Engineering, College of Agricultural and Life Sciences, University of Wisconsin, 460 Henry Hall, Madison, WI 53706.
Feel free to reproduce; please mention source.
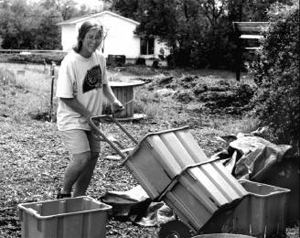
Problem: Carrying heavy boxes by hand is strenuous and awkward.
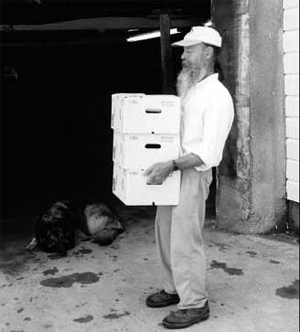
One Solution: Roll a stack of boxes with a hand pallet truck.
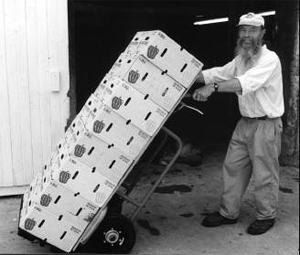
Pallet trucks are similar to regular hand trucks (dollies) with the exception of having pivoting forks instead of a plate metal shoe. If you stack your load on a small pallet (14”x24”), you can position the forks underneath and roll away as many as 16 5/9 bushel boxes. A pallet truck can be tilted (by releasing the forks) for loading and unloading and locked into an upright position to tip back and roll the load.
With a hand truck, you need to push a stack of boxes forward in order to squeeze the shoe under the stack. This can make the stack unstable. A pallet system keeps the load upright and stable until the truck is locked into position for moving. The shoe of a regular hand truck is fixed, which limits its use in tight quarters. Standard stackable containers tend to slide around on a regular hand truck when full because the bottom of the container has a smaller footprint than the top. But using a pallet underneath the standard containers, you eliminate the sliding.
Many small-scale growers store and pack produce in converted barns, older buildings, and coolers with tight spaces and narrow doorways. A full-size pallet and pallet jack require a very flat, smooth, hard surface to roll easily. Pallet trucks, with their narrow size and pneumatic wheels, roll easily through doorways and on rough surfaces.
There are several ways a pallet truck can increase your efficiency compared to moving boxes by hand. 1. The number of times you lift or lower a box can be cut in half. 2. If you would normally carry 3 or 4 boxes at a time, you can cut your total number of trips by 75%-82%. 3. By using a pallet truck you can cut the time you spend carrying boxes by 60%.
A new custom-made pallet truck with pallets costs $750. At $7.00/hr., you’d need to save yourself 143 hours for the system to pay for itself. Ten hours saved per month (30 minutes per weekday) means the system pays for itself in a little over 14 months of use. If you commonly visit a chiropractor or massage therapist to relieve back pain, the pallet truck system can pay for itself in less than 12 visits (at $50/visit).
Pallet trucks are commonly used for feed and seed sacks. Look in feed mills and co-ops for used pallet trucks which you can retrofit with a larger back frame to support two stacks of boxes. Valley Craft makes pallet trucks with the wider frame; these trucks are distributed by several dealers. Look under “materials handling” in your phone book or contact the following companies. This list is provided as a convenience for our readers. It is not an endorsement by the University of Wisconsin-Extension, nor is it exhaustive.
Fastenal Co.
1117 Ashwaubenon St.
Green Bay, WI 54304
414-432-9181
Reynolds Sales and Equipment
4255 Sunset Ridge
Cottage Grove, WI 53527
608-839-3417
Stoffel Equipment
P.O. Box 23341
Milwaukee, WI 53223
414-354-7500
Valley Craft
2001 South Highway 61
Lake City, MN 55041
800-328-1480
carts@valleycraft.com
This material was developed by the Healthy Farmers, Healthy Profits Project, whose goal is to find and share work efficiency tips that maintain farmers’ health and safety and also increase profits. For more information, visit our web site at http://bse.wisc.edu/hfhp/ or call 608-265-9451.
Healthy Farmers, Healthy Profits Project, Department of Biological Systems Engineering, College of Agricultural and Life Sciences, University of Wisconsin, 460 Henry Hall, Madison, WI 53706.
Feel free to reproduce; please mention source.
Problem: Packing produce in an unsystematic manner wastes time and effort.
One Solution: Design a well-organized, clear, step-by-step task and product flow.
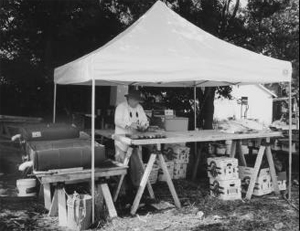
You may be able to save time and effort by slightly changing your current routine or habits.
On paper, diagram the flow of your product from field to packing box to cooler or truck, and note work stations. Have an outsider describe the flow so you don’t overlook any details you might take for granted. You can also videotape the packing process.
Any time saved during produce packing will save money. Indirect savings will occur from creating a more comfortable work area that will be healthier and less hazardous for you. If your produce moves more quickly through the packing process it will maintain higher quality and be fresher when packed.
This material was developed by the Healthy Farmers, Healthy Profits Project, whose goal is to find and share work efficiency tips that maintain farmers’ health and safety and also increase profits. For more information, visit our web site at http://bse.wisc.edu/hfhp/ or call 608-265-9451.
Healthy Farmers, Healthy Profits Project, Department of Biological Systems Engineering, College of Agricultural and Life Sciences, University of Wisconsin, 460 Henry Hall, Madison, WI 53706.
Feel free to reproduce; please mention source.
The following leaflets in English and Spanish illustrate these guidelines.
To keep your back healthy, try to:

This is what you may feel if you have hurt your back:
To help youself or relieve back pain:


Back pain affects many of us and makes it difficult for us to work. Sometimes back pain may be caused by the work that we have to do. But there are symptoms that let us know when our backs have been hurt and treatments to help us fell better.
If you need help to find a doctor or more information, please call
Information on Health Services for Farmworkers
8:00 am to 4:30 pm Central Time
1-800-377-9968
Acknowledgements
Produced by:
National Center for Farmworker Health Inc.
P.O. Box 150009
Austin, Texas 78715
(512) 312-2700, (800) 531-5120
Prepared by:
Viola Gomez, Ed Hendrickson, Dr. Karen B. Mulloy, Dr. Jim Meyers, Tammy Brannen-Smith, Pam Tau Lee, Dr. Mary Lynn Thames, and Madge Vasquez
Translation: Carolina Derber
Artwork: Inés Batilló
Para mantener un espalda saludable, trate de:

Algunos síntomas de dolor de espalda son:
Para ayudarse o para aliviar el dolor de espalda:
Tome aspirina, ibuprofén, o acetaminophen.
Haga ejercicios para estirarse.
El dolor de espalda nos afecta a muchos de nosotros y haze difícil nuestro trabajo. Algunas veces el dolor de espalda es causado por el trabajo que hacemos. Hay síntomas que nos indican que nuestra espalda se ha lastimado y hay tratamientos que nos ayudan a sentirnos mejor.
Si necesita ayuda para encontrar un doctor o más información, por favor, llame al:
Información de Servicios de Salud para los Trabajadores del Campo
8:00 am to 4:30 pm Hora del Centro
1-800-377-9968
Agradecimientos
Producido por:
National Center for Farmworker Health Inc.
P.O. Box 150009
Austin, Texas 78715
(512) 312-2700, (800) 531-5120
Preparado por:
Viola Gomez, Ed Hendrickson, Dr. Karen B. Mulloy, Dr. Jim Meyers, Tammy Brannen-Smith, Pam Tau Lee, Dr. Mary Lynn Thames, and Madge Vasquez
Traducción: Carolina Derber
Arte: Inés Batilló

Alethea Leandro is a workers’ compensation specialist with Norton-Parker Insurance Agency, and former Safety Director at Salyer American Fresh Foods in Salinas, California. At Salyer, she implemented ergonomic changes that significantly reduced workers’ compensation premiums for the company. Salyer American employs its own harvesting crews to harvest lettuce and celery on twenty-five small farms.
Q. What background did you have in ergonomics?
I began my career at a small farming operation as the personnel manager. When we moved to a new location we had the opportunity to design our packing shed from scratch. We designed it with the height of our employees in mind, making it more comfortable to stand and work at each location for a long time. This was the start of my ergonomics “training.” Little did I know there was a word for designing the workplace with the human body in mind.
Over the years, I’ve found that most of the equipment we use in California agriculture is designed by and for men. There are many women involved in this industry, and I found, for example, that if things were weighted properly, if the center of gravity was correct, I could use the equipment. If it had been mended or repaired with no concern for balance, I found it difficult to use the equipment safely. We soon began to consider the person using the equipment before any changes or repairs were completed.
Later, my “formal” ergonomics training took place at Human Resources conferences I attended.
Q. What sorts of changes did you implement in the fields?
A footrest on lettuce-packing equipment.
Another simple change was to pad a lot of solid surfaces. Some of it was not to bruise the food, and some of it was for people purposes. We used foam rubber with plastic over it so it could be washed down. For example, the cutters have to throw the lettuce or celery up onto a table to the employee who will pack it. That table is shoulder height with an angle iron edge on it, and people were bruising themselves by standing up and hitting the edge. So we padded that, and by padding it, we also raised the surface of the table for the woman or man who was packing, so they weren’t reaching as low for the produce and it didn’t require any twisting of the upper body. Along with these ergonomic changes, we painted hazards red to catch the eye—an area where a bolt might be sticking out, for example— so they could be avoided, and we trained the employees in the benefits of these changes. These are all small, inexpensive changes, but it’s amazing the difference they make.
Table padded with foam rubber and plastic.
Q. Did you have a hard time convincing your managers to make changes?
I had two factors in my favor. The workers’ compensation premiums were high, and California had just implemented legislation that required each employer to have a written Injury and Illness Prevention Program.
I began with small, easily implemented recommendations. Most recommendations were readily accepted and the results were positive. Along with mechanical changes, we began to change management and employee behaviors through training. What I found difficult was that the question most frequently asked was, “What is this going to cost?” rather than “What is this going to save?”
Q. How much savings did you see?
The loss ratio on our workers’ compensation went down steadily each year, which in turn brought the premium down. At year four our workers’ compensation premium decreased by one million dollars from the high at year two.
Not all of the savings were due to ergonomic or behavioral changes we had implemented. The manner in which workers’ compensation was calculated also changed in January of 1995. California began an open rating system, allowing carriers to discount your rate based on your safety programming. Our programming allowed us to benefit in this new system, with significant discounts on our premiums.
Ultimately, the number of work-related injuries dropped by over 50 percent, and we maintained an ongoing decrease in the number of injuries in our fields. Ergonomics works.
National Institute for Occupational Safety and Health (NIOSH). 4676 Columbia Parkway, Cincinnati, OH 45226-1998, 800-35-NIOSH (800-356-4674). Web site address: https://www.cdc.gov/niosh/index.htm.
NIOSH Agricultural Health and Safety Centers
To find a NIOSH Agricultural Health and Safety Center, click on the link: http://nasdonline.org/agcenter.php
The following are free from the NIOSH Publications Office. Call 800-356-4674 or fax 513- 533-8573.
Elements of Ergonomics Programs: A Primer based on Workplace Evaluations of Musculoskeletal Disorders. 1997. A. Cohen, C. Gjessing, L. Fine, B. Bernard, J. McGlothlin, editors. NIOSH Publication No. 97-117. This 132-page book outlines a seven-step process that tells you how to determine whether you need an ergonomics program and how to start one. Chapters include training, reviewing medical data, and developing solutions. Checklists and questionnaires for data gathering are included.
Participatory Ergonomic Interventions in Meatpacking Plants. 1994. By C. Gjessing, T. Schoenborn, and A. Cohen. NIOSH Publication No. 94-124. This 200-page book from NIOSH gives case studies of three companies that set up participatory programs with employees. Although the case studies are in meatpacking plants, the same principles apply in most workplaces.
Easy Ergonomics, A Practical Approach for Improving the Workplace. 1999. Published by the California Department of Industrial Relations, Cal/OSHA Consultation Service. Copies can be obtained at no charge from Cal/OSHA, Manager, Consultation Education and Training Unit, 2211 Park Towne Circle, Suite 4, Sacramento, CA 95825. 916-574-2528. Although this publication is geared toward general industry, the ideas presented are easily transferable to agriculture.
Blueprintstwo: The Ergonomics Manual. 1990. Published by Comprehensive Loss Management, Inc., Minneapolis. This 40-page guide is designed for supervisors and managers to help employees prevent cumulative trauma disorders. It discusses the risk factors of cumulative trauma disorders and specific prevention strategies, including 80 illustrations. Copies can be obtained for $4.95 each by calling 800-279-0288 ext. 122.
Listen to Your Body: Safe Lifting, Pushing and Pulling, English/Spanish, 1992, 30 minutes. Illustrates how back injuries occur and demonstrates safe lifting techniques. Made by the University of Florida. Available from: Safety Coordinator, Department of Agricultural and Biosystems Engineering, University of Arizona, Shantz Bldg, Room 403, PO Box 210038, Tucson, AZ 85721-0038. Materials are sent on a loan basis. User agrees to return materials on or before a scheduled date and to pay return shipping costs. Please request materials as far in advance as possible. Telephone requests accepted at 520-626-3134.
Ergonomic Programs That Work, English, 1998, 21 minutes. Shows how several companies resolved ergonomic problems in their workplaces, resulting in higher productivity and fewer lost workdays. Can be borrowed from U.S. Department of Labor, Occupational Safety and Health Administration, Office of Public Affairs, Room N3647, 200 Constitution Avenue, Washington, DC 20210. 202-693-1999. osha.videos@osha-slc.gov. Duplication of tape for further use is permitted. Can be bought from NTIS (National Technical Information Service) for $55 +$5 shipping and handling. Call 800-553-6847. Order #AVA20258-VNB1INA.
This equation is a simple way to determine a recommended weight limit for specific tasks. The equation plugs in factors such as the height from the floor that the object is picked up from, the distance the object is moved, and the frequency of lifts.
The equation and instructions on how to use it are available from the NTIS (National Technical Information Service). Ask for PB94-176930; cost is $12.00 plus $4.00 handling. Write to NTIS, U.S. Dept of Commerce, Technology Administration, Springfield, VA 22161. Call 703-487-4650 or fax 703-321-8547.
Contact your local county agricultural extension office. This is usually listed under county government in the phone book, but sometimes under U.S. government (agriculture) or state government.
You can also contact the extension services at land-grant universities. These are the big public universities in each state; in Michigan, for example, Michigan State University. Call the university’s agriculture department. For a complete list of university extension services, go to http://www.reeusda.gov/1700/statepartners/usa.htm (click on your state). Or contact CSREES (Cooperative State Research, Education, and Extension Service), an agency of the U. S. Department of Agriculture, at USDA, Washington, DC 20250-0900. Phone 202-720-3029. Fax 202-690-0289.
OSHA’s free consultation service is delivered by state governments using well-trained professional staff. Consultants can assist you in recognizing potential workplace hazards on your farm and suggest approaches or options for eliminating these hazards. Primarily for smaller, high-hazard businesses with 10 or more employees, this service is completely separate from OSHA enforcement. No citations are issued and no penalties are proposed.
Setting it up: Your phone call or letter sets the machinery in motion. The consultant will discuss your needs with you and set up a visit date. OSHA encourages a complete review of your work environment; however, you may limit the visit to a specific problem, such as ergonomics.
The walk-through: Together, you and the consultant will examine occupational safety and health conditions at your farm. OSHA encourages employee participation in the walk-through. Talking with employees helps the consultant identify and judge any hazards; it also allows the consultant to provide limited informal training, upon request.
The consultant will do an appraisal of all mechanical and environmental hazards and physical work practices, or will look just at the specific operations you designate. You will learn not only what you need to improve, but also what you are doing right. Hazard abatement dates are determined by you and the consultant.
The On-Site Consultant Will:
The On-Site Consultant Will Not:
For more information about the OSHA Consultation Program, you can contact the Consultation Project in your state (directory follows) or go to the OSHA web site at www.osha.gov.
ALABAMA Safe State Program, University of Alabama 205-348-3033 ALASKA Consultation Section, ADOL/AKOSH 907-269-4957
ARIZONA Consultation and Training, Industrial Commission, Division of Occupational Safety and Health 602-542-5795
ARKANSAS OSHA Consultation, Department of Labor 501-682-4522
CALIFORNIA CAL/OSHA Consultation Service, Department of Industrial Relations 415-703-5270
COLORADO Colorado State University, Occupational Safety and Health Section 970-491-6151
CONNECTICUT Department of Labor, Division of Occupational Safety and Health 860-566-4550
DELAWARE Department of Labor, Division of Industrial Affairs, Occupational Safety and Health 302-761-8219
DISTRICT OF COLUMBIA Program available only for employers within the District of Columbia DC Department of Employment Services, Office of Occupational Safety and Health 202-576-6339
FLORIDA Department of Labor and Employment Security, 7(c)(1) Onsite Consultation Program, Division of Safety 850-922-8955
GEORGIA Georgia Institute of Technology, 7(c)(1) Onsite Consultation Program 404-894-2643
GUAM OSHA Onsite Consultation, Department of Labor 671-475-0136
HAWAII Consultation and Training Branch, Department of Labor and Industrial Relations 808-586-9100
IDAHO Boise State University, Department of Health, Safety and Health Consultation Program 208-426-3283
ILLINOIS Onsite Consultation, Industrial Service Division, Department of Commerce and Community Affairs 312-814-2337
INDIANA Bureau of Safety, Education and Training, Division of Labor 317-232-2688
IOWA 7(c)(1) Consultation Program, Bureau of Labor 515-965-7162
KANSAS 7(c)(1) Consultation Program, Department of Human Resources 785-296-7476
KENTUCKY Labor Cabinet, Division of Education and Training 502-564-6895
LOUISIANA 7(c)(1) Consultation Program, Department of Labor 225-342-9601
MAINE Division of Industrial Safety, Bureau of Labor Standards, Workplace Safety and Health Division 207-624-6460
MARYLAND MOSH Consultation Services 410-880-4970
MASSACHUSETTS Division of Occupational Safety and Health, Department of Work force Development 617-727-3982
MICHIGAN (Health) Occupational Health Division 517-322-6823
MICHIGAN (Safety) Department of Consumer and Industry Services 517-322-1809
MINNESOTA Department of Labor and Industry, Consultation Division 612-297-2393
MISSISSIPPI Mississippi State University, Center for Safety and Health 601-987-3981
MISSOURI Onsite Consultation Program, Division of Labor Standards, Department of Labor and Industrial Relations 573-751-3403
MONTANA Department of Labor and Industry, Bureau of Safety 406-444-6418
NEBRASKA Division of Safety and Labor Standards, Department of Labor 402-471-4717
NEVADA Safety Consultation and Training Section, Division of Industrial Relations, Department of Business and Industry 702-486-9140
NEW HAMPSHIRE Department of Health and Human Services 603-271-2024
NEW JERSEY Department of Labor, Division of Public Safety and Occupational Safety and Health 609-292-3923
NEW MEXICO Environment Department, Occupational Health and Safety Bureau 505-827-4230
NEW YORK Division of Safety and Health 518-457-2238
NORTH CAROLINA Bureau of Consultative Services, Department of Labor, OSHA Division 919-807-2905
NORTH DAKOTA Division of Environmental Engineering 701-328-5188
OHIO Bureau of Employment Services, Division of Onsite Consultation 614-644-2246
OKLAHOMA Department of Labor, OSHA Division 405-528-1500
OREGON Oregon OSHA, Department of Consumer and Business Services 503-378-3272
PENNSYLVANIA Indiana University of Pennsylvania 724-357-2396
PUERTO RICO Occupational Safety and Health Office, Department of Labor and Human Resources 787-754-2171
RHODE ISLAND OSH Consultation Program, Division of Occupational Health and Radiation Control, Department of Health 401-222-2438
SOUTH CAROLINA Department of Labor, Licensing and Regulation 803-734-9614
SOUTH DAKOTA Engineering Extension, Onsite Technical Division, South Dakota State University 605-688-4101
TENNESSEE OSHA Consultation Services Division, Department of Labor 615-741-7036
TEXAS Workers’ Health and Safety Division, Workers’ Compensation Commission 512-804-4640 OSHCON Request Line: 800-687-7080
UTAH Labor Commission, Workplace Safety and Health, Consultation Services 801-530-6901
VERMONT Division of Occupational Safety and Health, Department of Labor and Industry 802-828-2765
VIRGINIA Department of Labor and Industry, Occupational Safety and Health, Training and Consultation 804-786-6359
VIRGIN ISLANDS Division of Occupational Safety and Health, Department of Labor 340-772-1315
WASHINGTON Department of Labor and Industries, Division of Industrial Safety and Health 360-902-5638
WEST VIRGINIA Department of Labor 304-558-7890
WISCONSIN (Health) Department of Health and Human Services, Division of Public Health, Section of Occupational Health 608-266-9383
WISCONSIN (Safety) Department of Commerce, Division of Marketing, Advocacy and Technology Development, Bureau of Manufacturing and Assessment 262-523-3044 or 800-947-0553
WYOMING Department of Employment, Workers’ Safety and Compensation Division 307-777-7786
We wish to thank those who helped with the production of this booklet: Writer-Editor: Jane Slaughter Graphic design and production: Jim West Cover photo: David Bacon Illustrations: Mike Konopacki (Huck/Konopacki Labor Cartoons, Madison, Wisconsin); Dan Watkins, Don Murdock, Richard Carlson (NIOSH, Cincinnati, Ohio). Focus group participants in San Luis Obispo, California, and for organizational help James Meyers, Kimberly Naffziger, and Richard Caveletto. Focus group participants in Sparta, Michigan, and for organizational help Manny Gonzalez and Jan Tijerina.
U.S. DEPARTMENT OF HEALTH AND HUMAN SERVICES
Public Health Service, Centers for Disease Control and Prevention
National Institute for Occupational Safety and Health
Edited by:
Sherry Baron, Andrea Steege, Nina Lalich
Division of Surveillance, Hazard Evaluations, and Field Studies
Cheryl F. Estill
Division of Applied Research and Technology

Publication #: February 2001
Disclaimer and Reproduction Information: Information in NASD does not represent NIOSH policy. Information included in NASD appears by permission of the author and/or copyright holder. More
