The intent of this occupational safety and health pocket guide is to serve as a quick reference for employers and workers of the agriculture industry. This pocket guide highlights common hazards found in various agricultural workplaces and best practices in hazard controls and injury/illness prevention.
This pocket guide is intended to serve the diverse agricultural operations found across Washington State. However, many of the safety and health topics and concepts found in this guide can be transferred to agricultural operations found in other locations, and they can be applied across different business operations.
Disclaimer: This pocket guide is designed to help employers and employees in the agriculture industry in the state of Washington to:
Do their jobs safely.
Comply with the Washington Industrial Safety and Health Act (WISHA) and Division of Occupational Safety and Health (DOSH) regulations.
This pocket guide does not replace any or cover all of the requirements detailed in the actual WISHA law or DOSH regulations. The pocket guide should only be used as a companion to the actual regulations.
If there is any inconsistency between the pocket guide and the WISHA/DOSH regulations, the WISHA/DOSH regulation will always prevail. This pocket guide should never be considered a substitute for any provisions of a regulation. It is a summary of the agriculture requirements under WAC 296-307 and does not include all workplace safety and health requirements related to agriculture.
Please refer to WAC 296-307 for rules and requirements regarding the agriculture industry.
PART 1 Think Safety
Part 1A – Employer Responsibilities
Every year, agricultural workers in Washington State experience injuries or illnesses that may limit their ability to perform their jobs in the agriculture industry. Agriculture ranks among the most hazardous industries in the country, according to the National Institute for Occupational Safety and Health (NIOSH). It is also one of the few industries in which whole families can be at risk for injury, illness or death because children, spouses and other relatives often work and live together on farms, ranches and other agricultural worksites.
Every employer should make safety and health a priority and not accept that “accidents just happen.” Employers who strive to create a safety culture in the workplace show employees that they are valued and that working safely plays an important role in creating a successful business.
All employers are required to:
Provide a safe and healthy working environment that is free of recognized hazards likely to cause serious injury or death.
Ensure that employees do not use defective or unsafe tools and equipment, including tools and equipment that may be furnished by the employee.
Furnish and require employees to use any safety devices and safety guards that are needed to control recognized hazards.
All agricultural methods, operations and processes must be designed to promote the safety and health of employees.
Prohibit the removal, displacement, damage or destruction of any safety device, safeguard, or notice of warning.
Prohibit anyone from interfering with the use of any safety device, method or process adopted for the protection of any employee.
Implement a written Accident Prevention Program (APP), or safety plan.
Implement a Chemical Hazard Communication (Hazcom) program.
Provide and ensure employees understand job specific safety and health training.
Part 1B – Employee’s Rights and Responsibilities
Workers who are not safety conscious are a danger to themselves and others around them. Employees must cooperate with the employer and other employees in efforts to prevent injuries, illnesses and deaths. Conduct yourself in a manner that reflects favorably on yourself, your employer and your industry at all times.
Employee Rights
You have the right to a safe and healthy workplace free of recognized hazards.
You have the right to raise safety and health concerns without retaliation or discrimination.
You have the right to refuse unsafe work assignments and job tasks where protections are not in place to prevent incidents without fear of losing your job.
You have the right to file a complaint with Labor and Industries if you feel the employer has not taken appropriate steps to provide a safe and healthy workplace.
You must be provided with required Personal Protective Equipment (PPE) at no cost.
As an employee, you must:
Be informed, observe and understand all safe practices.
Notify the employer of unsafe or unhealthy conditions in the workplace.
Use all required safety devices and protective equipment.
Not intentionally damage PPE.
Report any job-related injury or illness to your immediate supervisor, regardless of the degree of severity.
Not engage in any activity unrelated to work that may cause injury to other employees during the course of performing work assignments.
Attend any required training and orientation programs designed to increase your competency in occupational safety and health.
Not report to work under the influence of alcohol or controlled substances or bring alcohol or controlled substances to the worksite.
Remember: If you are unsure of something, contact your supervisor.
Ask if you don’t understand something.
Don’t take chances or shortcuts.
Help others learn safe work practices.
Watch out for the safety of other workers.
Plan your work to avoid injuries.
Keep your mind on your job.
Be in good physical condition before starting work.
Don’t engage in fighting or horseplay on the job.
Part 1C – Written Workplace Safety and Health Plan and Training
Employers must develop a written Accident Prevention Program (APP), or safety and health plan, tailored to the needs of the operation and to the types of hazards involved. The APP is the foundational safety and health plan that informs employees about the hazards they will face and the protections the employer has put in place to keep them safe and healthy.
The APP must contain at least the following elements:
How, when and where to report injuries and illnesses, and the location of first-aid facilities.
How to report unsafe conditions and practices.
The use and care of personal protective equipment.
What to do in emergencies. See Part 2A.
Identification of hazardous chemicals or materials and the instruction for their safe use.
An on-the-job review of the practices necessary to perform job assignments in a safe and healthful manner.
The APP will likely contain additional policies and procedures that outline safe and healthy work practices, training requirements, inspection procedures and the employee’s responsibilities to work safely. The employer must ensure the APP is “effective in practice” by regularly inspecting the workplace and observing employee work behaviors to make sure procedures are followed.
Although not required by the rules, the employer may consider having a safety incentive program and disciplinary programs that help promote a culture of safety and health awareness, reporting of near misses, and injury prevention, but does not reward for non-reporting of injuries.
Safety Orientation
All employers must give new employees a safety and health orientation when they are hired. The orientation must occur before work starts. The orientation will cover a review of the employer’s APP and specific hazards associated with the job tasks.
Safety Meetings
After the initial orientation, foreman-crew safety meetings must be held monthly. The meetings must be tailored to the operations or work activity at the time. Document safety meeting minutes by recording the topics discussed and attendance. Keep records of the meeting minutes for one year.
Part 1D – Fatality and Incident Reporting
Work-related injuries and illnesses can range in severity from those requiring hospitalization of the worker to less severe conditions that can be treated onsite with proper first aid. It is everyone’s responsibility to report all incidents and investigate them to identify root causes to prevent future occurrences.
Employer Obligations
OSHA injury and illness recordkeeping: This is a system for reporting and recording accidents on a log (for example, OSHA 300, 301) that is kept annually. Every employer that has 11 or more employees at any time during the year is required to keep an OSHA log.
Report fatalities and hospitalizations: Employers are required to report to L&I within 8 hours of first learning of any incident that:
--Causes fatal or possibly fatal injury.
--Involves acute injury or illness from exposure to pesticides.
--Causes injury requiring in-patient hospitalization of any employee.
--Involves any amputation or loss of an eye (within 24 hours if no hospitalization).
Reports can be made to the nearest L&I office or by calling the L&I toll-free hotline at 1-800-423-7233. You can also call the OSHA toll-free hotline at 1-800-321-6742 and leave a message that will be routed to L&I.
Employee Obligations
Report all incidents: Each employee must promptly report any job-related injury or illness to his or her immediate supervisor, regardless of the degree of severity. This includes incidents when immediate first aid or medical help may not be necessary. Providing injury and illness information to the employer will help to prevent similar incidents in the future.
Carefully explain what happened: Don’t jump to conclusions or try to blame anyone for the incident; just describe what happened carefully and honestly. Assist your employer in filling out the accident report.
PART 2 First Aid, Emergency Procedures and Training
Part 2A – Emergency Procedures
Plan for every farm location, including the home, machinery sheds, barns and field. Know and practice what to do in case of an emergency.
If a fire, serious injury incident or medical condition occurs, shout for help and tell a specific person to call 911.
When calling 911, give the dispatcher the following information and remain on the phone until information is confirmed and the dispatcher says to hang up.
--Location of and directions to the emergency. --Type of emergency. --Number of victims. --Location phone number. --Treatment given the victim(s).
Part 2B – Emergency Wash Facilities
Make sure emergency washing facilities are functional and readily accessible.
Make sure supplemental flushing equipment provides sufficient water.
Make sure hand-held drench hoses deliver at least 3 gallons (11.4 liters) of water per minute for 15 minutes or more.
Make sure personal eyewash equipment delivers only clean water or other medically approved eye flushing solutions.
Part 2C – First Aid
Make sure that first-aid trained personnel are available to provide quick and effective first aid.
Ensure that appropriate first-aid supplies are readily available. Keep and maintain an appropriate kit on each major piece of farm equipment, truck, auto, and in the barn, shop and the home.
PART 3 Making a Workplace Safe
Part 3A – Housekeeping
Lack of proper housekeeping on the job is one safety hazard common to many workplaces. Good housekeeping can help improve not only safety on the job, but also morale and productivity of employees. One of the easiest ways to prevent accidents and injuries is to maintain a neat and orderly workplace.
You must ensure that all places of employment are kept clean to the extent that the work allows.
You must ensure that the floor of every workroom is kept as dry as possible. Where wet processes are used, you must maintain drainage. Employers must provide false floors, platforms, mats or other dry standing places where practical, or provide appropriate waterproof footgear.
To facilitate cleaning, every floor, working place and passageway must be kept free from protruding nails, splinters, loose boards and unnecessary holes and openings.
Cleaning and sweeping must be done to minimize dust in the air and when practical, done outside of working hours.
The following general rules apply to housekeeping:
Remove debris from the job on a regular basis.
Keep aisles, stairways, walkways and doorways clear.
Store materials only in their designated areas.
Place trash barrels with covers where needed to eliminate food waste.
Keep tools and equipment stored neatly.
Keep extension cords from being strung across walkways; if necessary, run them overhead. The same applies to all cords, cables and hoses.
Keep scrap lumber with protruding nails separate from other debris. Bend nails over or remove from lumber.
Remember: Good housekeeping aids everyone and makes it easier for everyone to do their work safely.
Part 3B – Fire Extinguishers
Fire extinguishers can put out or control a fire until help arrives. Use portable units as emergency units on small fires or in the initial stages of the fire.
Things to remember:
All fires are not the same. Know which fire extinguishers to use for each type of fire hazard.
Point out the location of all fire extinguishers in the workplace.
Train employees how to read the label, select the proper unit and how to operate, inspect and maintain it. Let employees practice using an extinguisher.
The discharge time on most portable units is only seconds, so plan an escape route. Stay low and avoid breathing the smoke and extinguishing agent. If the fire starts to spread, GET OUT! Use a fire extinguisher only if you are in a safe location.
Selecting the Proper Fire Extinguisher
The universal classification system has four designations for fire extinguishers: Class A, B, C and D. Select the appropriate size of fire extinguisher based on the size of fire to be extinguished and the contained extinguishing agent. Combination extinguishers are suitable for more than one class of fire and are marked as such on the unit.
Types and Applications
Class A: Fires involving materials such as wood, paper and cloth, which produce glowing embers or char.
Class B: Fires involving flammable gases, liquids and greases, including gasoline and most hydrocarbon liquids, which must be vaporized for combustion to occur.
Class C: Fires involving live electrical equipment or in materials near electrically powered equipment.
Class D: Fires involving combustible metals, such as magnesium, zirconium, potassium and sodium.
Combination: Such as ABC or BC.
Inspection and Maintenance
Monthly checks for:
Inspection tag.
Anti-tamper seal.
Weight or pressure check.
Damage or missing parts.
Rust or corrosion.
Know where your fire extinguishers are located.
PASS System: Use PASS to remember basic information for discharging a portable fire extinguisher:
P – Pull pin.
A – Aim at base of fire.
S – Squeeze the actuating handle.
S – Sweep from side to side.
Part 3C – Walk-Around Safety Inspections (Self-Inspections)
Employers must take actions to identify existing and potential hazards in the workplace. This is accomplished through regular walk-around safety inspections. In addition to reviewing injury records and investigating incidents for their causes, management and the safety committee, or assigned employees must regularly check the workplace for hazards.
Ways to Perform Your Inspections
Annual site survey
--Perform a wall-to-wall walk-through inspection of the entire worksite. --Document observed and potential hazards. --Use the information to correct hazards, target specific work areas for follow-up, revise in-house inspection checklists and review the effectiveness of your accident prevention program.
Periodic change survey
--Look at any changes of work activities to identify safety issues. --Changes include new equipment, changes to processes or a change to the building structure. --Examine the changed conditions and make recommendations to correct any hazards that were or may be created as a result of the work change.
Monthly safety inspection
--Each month, you and an employee representative must inspect active work areas for hazards. --Use a standard safety inspection checklist that is tailored to the worksite. --Talk to workers about safety concerns.
--Report any hazards for follow-up correction.
--Communicate the results of the inspection to employees.
Job Hazard Analysis (JHA)
--A Job Hazard Analysis is good for performing a comprehensive review of work practices to identify and correct hazards. Each job should be analyzed before new work begins or when an injury has occurred. You can use one of the sample forms found at www.Lni.wa.gov/Safety/Topics/AtoZ/JHA .
Part 3D – Exits
“Exit” means the portion of an exit route that is generally separated from other areas to provide a protected way of travel out of the workplace. See WAC 296-307-350.
Keeping Exits Clear
Provide clear exit access for employees and others who may be visiting your workplace to safely exit
buildings, offices, processing rooms or other areas of the workplace in case of fire or other emergency.
Preventing fire and tripping hazards in exits:
Do not allow storage of any type in any part of access or exit ways of buildings or other work areas that creates a blocking or tripping hazard.
Limit storage in access-ways in buildings to non-combustible items stored in appropriate storage cabinets or shelving. Do not permit flammable liquids or other hazardous material storage.
Limit corridor storage to items used in daily operations.
Do not allow storage to obstruct safety showers, eye washes, fire extinguishers, exit doors, fire alarm pull stations, electrical panels or any other safety feature of buildings or facilities.
Ensure that two exit routes, remote from one another, are available to provide alternate means for employees to safely leave the workplace during an emergency.
Mark any doorway or passage that might be mistaken for an exit “Not An Exit,” or mark with an indication of its actual use.
Have an emergency action plan in writing and make it available to employees.
PART 4 Chemical Safety
Hazard communication is a very important part of the employer’s safety program. The purpose is to give employees the knowledge they need to properly handle hazardous chemicals and materials. Unsafe handling of hazardous chemicals and materials can lead to injuries or illnesses such as burns, respiratory damage, and blindness.
Part 4A – Chemical Hazard Communication (Hazcom) Program
If hazardous chemicals will be used by employees, a written Hazcom program must be in place. The Hazcom program contains:
A list of all hazardous chemicals available on the job.
Procedures for ensuring that containers are properly labeled.
Training for workers to recognize and safely handle hazardous materials, understanding the safety data sheets (SDS), required PPE and signs and symptoms of exposure.
Emergency procedures for chemical spills or accidents.
Part 4B – Flammable Products and Solvents
When working with flammables and solvents, people can be overcome by vapors or severely burned. Here are some precautions to take when working with flammables and solvents.
Storage of Flammables and Solvents
Read the SDS and label for each chemical for safe storage guidelines.
Store containers so labels can be easily read.
Make sure lids and tops are tightly secured before storing.
Do not store flammables near stairways or exits. Keep fire doors and walkways clear.
Always keep flammables away from any ignition sources, such as heat, flames, sparking equipment or even unshaded light bulbs.
Make sure there is good ventilation in the storage area.
Be aware of storage requirements for different quantities and classifications of flammable and combustible liquids. Some may require an approved storage cabinet, a safely constructed storage room or safe distances from buildings.
Always keep flammable liquids in an approved safety container when not in use.
Always bond and ground containers when transferring materials to prevent a buildup of static electricity, which potentially could create a spark. The ground will eliminate any static electrical charges created.
Handling Flammables and Solvents
Read the label and follow the manufacturer’s recommendations for applications and handling.
Always wear the required PPE. Check the SDS for proper skin, eye and respiratory protection. Required PPE may include specific types of gloves, goggles, skin protection or a respirator.
Make sure the work area is well ventilated. If the area is not well ventilated, use nonsparking fans to help circulate the air.
Never smoke around solvents and adhesives; the vapors can ignite.
Avoid open flames. Acetylene, electric welders and other flame-producing equipment may ignite vapors.
Check that fire extinguishers are easily accessible.
When cleaning tools, use non-solvent based cleaners, if possible.
Properly dispose of used rags containing flammables and solvents. Do not throw solvent or oil residue rags in a trash can. Used rags should go in a safety container that will prevent combustion or fires.
Part 4C – Pesticide Safety
Using pesticides for growing plants can create safety and health risks for workers and others around the workplace. However, following safe work practices and good training can reduce the risk of injury or illness to people from pesticides.
Employers and employees must follow the pesticide label requirements.
Rules for safe work practices and training can be found in the Worker Protection Standard (WPS). See WAC 296-307, Part I. Note: There are differences in safe work practices and training for general workers and pesticide handlers.
Worker Protection Standard Requirements
Central notification: Pesticide application information, the pesticide safety poster, and emergency contact information must be displayed in a central location that is easily accessible to employees.
Notice of applications: The pesticide label gives instructions on how to notify workers of pesticide applications. Pesticide label requirements for notification may be verbal, through posting warning signs, or both.
Training: Workers and handlers must receive training prior to entering an area treated with pesticides or before handling pesticides.
Trainers must be qualified as a Certified Pesticide Applicator, designated as a trainer by the Department of Agriculture, or have attended a Washington State approved trainer course.
Training must be repeated at least every 5 years for workers and handlers.
Workers are trained on 11 safety points. Handlers are trained on 13 safety points. See WAC 296-307-12040 and 296-307-13025 for more information.
PPE: The minimum PPE requirements for pesticide handling and early-entry work activities are outlined in the pesticide label. Employers must provide and require the use of the PPE.
Decontamination: Decontamination supplies are provided for workers and handlers to assist with cleaning off pesticides.
Handler Decontamination:
Soap, water, disposable towels and clean coveralls.
Located at mix/load sites, within one-quarter mile of work area or vehicular access, and where PPE is removed.
6 gallons of emergency eyewash provided at mix/load and decontamination sites when label requires protective eyewear.
1 pint of immediately available eyewash must be with the handler when the label requires protective eyewear.
General Worker Decontamination:
Clean water, soap and disposable towels.
Located within one-quarter mile of work area or closest point of vehicular access.
Application restrictions and handler monitoring:
Pesticides must be used only in a way that no person except properly trained, equipped and protected handlers come in contact with pesticides.
Prevent drift, splashes, spills and unplanned pesticide contact during mixing/loading, application and decontamination.
When handlers are applying “skull and crossbones” pesticides, sight or voice communication with handlers must be made at least every 2 hours by another trained and equipped handler.
Cholinesterase Monitoring for Handlers
Employees that handle Class I or Class II organophosphate or N-methyl carbonate pesticides for 30 hours or more in consecutive 30 days during the spraying season, must be trained on the cholinesterase monitoring rule and be allowed to participate in the program.
The medical monitoring program involves:
Baseline and follow-up medical testing.
Pesticide work practice evaluations. See WAC 296-307, Part J-I for more information and helpful tools.
Pesticide Recordkeeping
Records of pesticide applications (more information than required at Central Notification) and pesticide inventories must be kept by the employer. Records are kept for 7 years. See WAC 296-307, Part J for more information and recordkeeping forms.
PART 5 Personal Protective Equipment
Personal protective equipment (PPE) such as safety glasses, gloves, respirators and face shields can help protect employees from injury or illness. However, PPE will only be effective in protecting employees when:
The safety or health hazard has been adequately identified.
The proper PPE has been selected to protect against the hazard.
Employees have been trained on use, inspection, and maintenance of the PPE.
Employees are regularly monitored for proper use of the PPE.
Part 5A – Who is Responsible for Providing PPE?
Employers must provide personal protective equipment at no cost to employees, including replacement due to normal wear and tear.
Exception: You may require employees to provide their own normal work clothing, including long-sleeved shirts, long-legged pants and socks.
Make sure if employees provide their own PPE that it is approved for the workplace hazards and maintained in a clean and reliable condition.
Part 5B – General Requirements for PPE
Employers must train employees prior to using any PPE. Training must occur:
During the new employee orientation.
When job tasks require the use of specialized PPE, such as respirators, chemical suits and fall protection equipment.
Training must cover:
The manufacturer’s instructions on how to use, inspect and maintain the PPE.
Any special limitations or precautions indicated by the manufacturer.
Inspection
Before each use, employees must inspect all PPE for leaks, holes, tears or worn places.
Employees must notify the employer of any defects in PPE or when the equipment becomes contaminated.
Use
Employees must use PPE according to instructions and training received.
Employers must take appropriate measures to prevent heat-related illness that may be caused by employees wearing any required PPE.
Maintenance
Any damaged PPE must be repaired or discarded.
Part 5C – Eye and Face Protection
Many work tasks such as pruning, welding, grinding, wood cutting and chemical applications can create a serious hazard to the eyes and/or face.
Make sure employees exposed to hazards from flying objects have eye protection with side protection.
Make sure eye protection for employees who wear prescription lenses:
--Incorporates the prescription into the design of the eye protection; or
--Is large enough to be worn over the prescription lenses without disturbing them.
Make sure PPE used to protect the eyes and face meets the specifics of ANSI Z87.1. Note: Prescription glasses or sunglasses without the ANSI Z87.1 designation are not considered approved devices for protecting the eyes or face.
Employees who wear contact lenses should take extra precautions when handling certain chemicals. Approved chemical goggles may be required.
Part 5D – Protecting the Body
Many agricultural related injuries occur to the head, hands, skin and feet. Various types of PPE can help.
Head Protection
Head protection must be worn whenever employees are working in areas where there is potential for falling or flying objects.
Head protection must meet the specifications of ANSI Z89.1.
Employees working around machinery or in locations that present a hair-catching or fire hazard must wear caps or head coverings that completely cover their hair.
Bump caps can protect employees that routinely travel under machinery, platforms and work structures.
Hand Protection
Examples of hand hazards include:
--Contact with corrosive substances.
--Severe cuts, lacerations, abrasions or punctures.
--Chemical burns and/or thermal burns
--Temperature extremes.
When choosing hand protection, ensure that the gloves fit well, and consider how well the hand protection performs relative to the:
--Task.
--Conditions present.
--Duration of use.
--Hazards and potential hazards.
Proper work clothing is required when employees are exposed to hazards to the skin such as cuts, chemical burns and thermal burns.
Aprons, face shields, leather welding jackets, chemical suits and rain gear are examples of PPE that can protect against various skin hazards.
Part 5E – Lung/Respiratory Protection
Airborne hazards in agriculture are created by pesticides, dusts, chemicals and toxic gases from decomposing biological waste. Oxygen-deficient atmospheres can be found in controlled-atmosphere environments and holding tanks for various agricultural products. Unless these hazards have been eliminated through engineering controls, employers must require employees to use respirators.
Employers are required to provide respirators, medical evaluations, fit-tests and training at no cost to employees.
See WAC 296-307 Part Y-5 for requirements when employees voluntarily use a respirator.
Requirements for Safe Respirator Use
Respirator program administrator: Assign a capable individual to develop and manage the respiratory protection program.
Written program: Develop and implement a written program that outlines all of the requirements for safe respirator use.
Respirator selection: Respirators that prevent the employee from being exposed to harmful levels of airborne substances or oxygen deficient atmospheres must be selected. For pesticides, follow the agricultural use requirements on the label. See WAC 296-307 Part Y-6 for information on evaluating other respiratory hazards.
Medical evaluations: Employees must be evaluated by a licensed healthcare professional (LHCP) to determine if they can safely wear the respirator required for the job.
Frequency of evaluation:
Before respirator use occurs.
If the LHCP requires evaluation.
If a supervisor or program administrator determines one is necessary.
If medical signs or symptoms are reported by the employee.
Medical questionnaire: Use a questionnaire that meets the requirements of WAC 296-307-62005.
Fit-testing: Employees must receive a fit-test that determines if the size and type of respirator gives a good seal with the employee’s face. See WAC 296-307-62010 for requirements on selecting the proper fit-test procedure.
Frequency:
Before initial respirator use.
At least every 12 months from last fit-test.
Whenever a new respirator is chosen, physical changes occur in an employee that could cause a poor seal, or the employee reports seal problems.
Seal checks: Employees must perform a seal check of the respirator each time it is worn. See WAC 296-307-62020 for seal check procedures.
Training elements
Why the respirator is necessary.
Respirator capabilities and limitations.
How improper fit, use and maintenance can affect safety.
How to inspect, put on, seal check, use and remove the respirator.
How to clean, disinfect and store the respirator.
How to use the respirator in emergencies.
Medical signs and symptoms that can affect respirator use, such as shortness of breath and dizziness.
What the employer is required to do for safe respirator use.
Maintenance: Respirators must be maintained so they function properly and do not create health hazards.
Clean respirators regularly.
Store the respirator in a container or sealable bag to protect it from deformation, sunlight or extreme temperatures, contamination and excessive moisture.
Inspect the respirator daily or before each use for damage, function and proper fit.
Respirators that use a cartridge or canister must have a change-out schedule that tells employees how long the cartridge or canister can safely be used (for example, 8 hours of use). The change-out schedule must be documented in the written program.
Part 5F – Noise ( Hearing Loss Prevention)
Tractors, chainsaws, power pruners, air compressors, landscaping equipment and processing machinery are some types of equipment that can create noisy work environments. High noise levels can result in long-term health effects, such as hearing loss, permanent ringing in the ears (tinnitus) and even high blood pressure.
Employers are required to evaluate noise levels in the workplace when reasonable information indicates that noise levels may be above 85 decibels for an 8-hour Time Weighted Average (85 dBA TWA8).
Examples that can indicate exposures that equal or exceed 85 dBA TWA8, include:
Noise in the workplace that interferes with people speaking, even at a normal level.
Information from the manufacturer of equipment you use in the workplace that indicates high noise levels for machines in use.
Reports from employees of ringing in their ears or temporary hearing loss.
Warning signals or alarms that are difficult to hear.
Use of tools and equipment such as the following:
--Heavy equipment or machinery. --Fuel-powered hand tools. --Compressed air-driven tools or equipment in frequent use. --Power saws, grinders or chippers.
See WAC 296-307 Part Y-7 for information on how to perform a noise survey and what to do if noise levels exceed the 85 dBA TWA8 threshold.
PART 6 Electrical Hazards
The use of electrical tools is common. They make many jobs easier and more efficient.
However, electricity can present serious hazards. Electrical tools, power cords, outlets, electrical boxes and power lines can create electrocution hazards when proper installation, maintenance and use of electrical equipment are not followed. An electrocution can occur in only a split second of carelessness.
Employees must report immediately to their employer all shocks from electrical equipment, no matter how slight. The equipment causing the shock must be checked and any necessary corrective action taken immediately.
Electrical repairs must be made only by “qualified” individuals who are authorized by the employer.
“Qualified person” means a person who is familiar with the construction and operation of the equipment and the hazards involved.
Note 1: Whether an employee is considered a “qualified person” depends on various circumstances in the workplace. It is possible and likely for an individual to be considered “qualified” with regard to certain equipment in the workplace, but “unqualified” as to other equipment.
Note 2: An employee undergoing on-the-job training and who, in the course of such training, has demonstrated an ability to perform duties safely at his or her level of training and who is under the direct supervision of a qualified person is considered a qualified person for the performance of those duties.
Follow safety-related work practices when installing and servicing electrical equipment. See WAC 296-307-378 for requirements.
Part 6A – Safe Work Area and Identifification
Work Area
Maintain a safe work area around electrical equipment that will provide enough room to access the equipment without tripping or falling. Additionally, the work area should be large enough to allow someone to safely move around with tools and materials.
Make sure the area in front of electrical panels, circuit break boxes and similar equipment:
Has at least 3 feet of working space in front, measured from the exposed live parts or the enclosure front. See WAC 296-307-36230 for additional requirements for equipment over 600V, nominal.
Has sufficient working headroom of at least 6 feet 3 inches.
Has enough clearance to allow a hinged panel or door to open a minimum of 90 degrees.
Is kept clear and free of stored materials so that employees can access this equipment for servicing, adjustments or maintenance.
Has at least one access route to provide free and unobstructed access.
Has adequate indoor lighting.
Identification
Improperly labeled electrical equipment can create confusion and serious risk of electrocution. Mislabeled circuits can be overloaded when too much equipment is connected, creating a potential electrical and fire hazard. Label circuit breakers, switches, controls and disconnects.
All electrical equipment in use must have the manufacturer’s name, trademark or other descriptive marking of the organization responsible for the product on the equipment. Other markings must be provided giving voltage, current, wattage or other ratings as necessary.
Each electrical disconnect for motors and equipment, service, feeder and branch circuits must be legibly marked to indicate its purpose, unless its purpose is obvious by location and arrangement.
The marking must be durable enough to withstand the environment.
Part 6B – Provide Safe Electrical Equipment
Protect Live Parts
Electrical equipment must be protected to prevent accidental contact with live parts by employees or any objects they carry.
Options for Protecting Live Equipment
Use an approved cabinet, enclosure, cover or guard to protect live equipment.
Locate equipment in a room, vault or on a platform that limits access only to qualified individuals. Clearly mark entrances to prevent unauthorized entry.
Equipment 8 feet or less above the floor or other working surface must be protected. This includes light fixtures that are exposed to physical damage.
All splices of conductors must be the same wire size and insulation as the original wiring. (Basic electrical tape or wire nuts/ caps by themselves are not considered equivalent insulation or protection for the conductors).
Electrical Panels and Outlets
Unused conductor openings in the tops, bottoms, and sides of panels and boxes must be filled-in or protected with approved covers.
Open circuit breaker openings must be protected with an approved blank cover. (Tape, paper or cardboard are not considered approved covers).
Faceplate covers must be installed on outlets. Check for cracks and broken plates.
Hazardous Environments
Combustible materials: Electrical equipment that produces arcs, sparks, flames or molten metal must be enclosed or separated from combustible materials like paper, wood, certain dusts, gases, vapors and liquids. See WAC 296-307-36218.
Damp and wet locations: Weatherproof panels, cutout boxes, fittings, receptacles and panel boards must be installed to prevent moisture or water from entering the enclosure.
Grounding and Bonding
Make sure electrical equipment is effectively grounded with a clearly identified conductor.
The path to ground must be continuous.
Never attach the ground conductor to a lead terminal.
Ground equipment where dust, grain or liquids are moving between containers.
Part 6C – Electrical Cables and Power Tools
It is important to continually inspect flexible cables and cords, plugs and tools to make sure there is no damage that could create an electrocution hazard.
Requirements for power cords, extension cords and tools:
All cords are to be inspected regularly.
Make sure the grounding pin is present and connected. If not, the extension cord must be taken out of service.
Make sure the outer insulation sheathing is not pulled away from a plug (or terminal) end. This can cause strain on the terminal leads.
Any cords that are frayed, cut or have exposed wires must be removed from service. This includes cords with damage to the insulation.
Use only three-prong, double-insulated extension cords.
Do not run cords through walkways, windows or doors where they can create tripping hazards or are exposed to physical damage. Extension cords should not be attached to the surface of any building.
Extension cords cannot be used in lieu of permanent wiring.
Extension cords can be used only for temporary (90 days or less) power.
All power tools must be the three-pronged type, unless the tool is double-insulated and clearly marked as such.
Tools that are not double-insulated must be inspected prior to use to ensure the cords are in a safe condition.
Part 6D – Overhead Power Lines
When work tasks require equipment, materials and people to be near overhead power lines and other high voltage (600V and higher is considered high voltage) conductors it can present serious risks for electrocution.
Remember when working near overhead power lines:
All exposed overhead conductors must be isolated from accidental contact by employees or equipment.
Irrigation pipe must not be stored within 100 feet of overhead conductors.
Upending irrigation pipe within 100 feet of overhead conductors is prohibited.
Water and irrigation systems and other devices that discharge a conductive liquid, must be set up and operated so that the discharge from the system is directed more than 10 feet away from overhead high-voltage lines. Avoid liquid contact with any exposed electrical power.
Only trained and authorized employees can work in proximity to high-voltage lines, and then only if protections are in place to prevent accidental contact.
Maintain a safe distance from power lines:
Keep equipment and machines that are operated near overhead power lines at least 10 feet away from the lines.
Designate someone to observe clearance and warn the operator when it is difficult for the operator to see well enough to maintain the necessary 10-foot clearance.
Post a warning sign on all equipment that says it is “unlawful to operate this equipment within 10 feet of high-voltage lines.”
Call the high-voltage utility company prior to performing any work within 10 feet of the power line so they can assist you with proper safety procedures. This must be done before work begins.
PART 7 Farm and Field Equipment Operations
Part 7A – Tractors
In Washington, tractor accidents are the leading cause of fatalities in agriculture.
“Agricultural tractor” means a two-wheel-drive or four-wheel-drive vehicle, or a track vehicle of more than 20 net engine horsepower, designed to furnish the power to pull, carry, propel or drive implements that are designed for agriculture. All human-powered implements are excluded.
“Low-profile tractor” means a wheel or trackequipped vehicle with the following characteristics:
The front wheel spacing is equal to the rear wheel spacing, as measured between the centerlines of the wheels;
The clearance from the bottom of the tractor chassis to the ground is 18 inches or less;
The highest point of the hood is 60 inches or less; and
The tractor is designed so that the operator straddles the transmission when seated.
Roll-Over Protective Structure (ROPS) and seatbelts: For most agricultural tractors, ROPS and seatbelts are required. For low profile tractor exemptions from the ROPS and seatbelt requirement, see WAC 296-307-08015 and WISHA Regional Directive 33.20.
Operator training: Use the following list as a starting point to develop safety instructions tailored to your specific equipment and circumstances.
Employees should operate tractors only after receiving proper training. Make sure training covers the operator’s manual when available and is communicated in a language the operator will understand.
Inspect the tractor for any unsafe conditions before operating.
Use proper mounting and dismounting techniques (always use 3-point contact to the tractor).
Start tractor only from the operator’s seat.
Securely fasten the seat belt if the tractor has a ROPS.
Survey the working area and mark off any hard-to-see or hidden hazards.
Never allow riders.
Reduce speed when turning, crossing slopes and maneuvering through rough, slick or muddy surfaces.
Stay off slopes too steep for safe operation.
Hitch only to the drawbar and hitch points recommended by tractor manufacturers.
When tractor is stopped, be sure to set brakes securely.
Tractor Pre-Use Inspection Checklist
Part 7B – Farm Field Equipment
“Farm field equipment” means tractors or implements, including self-propelled implements, used in agricultural operations.
Almost all agricultural operations involve tractors with implements, or some other form of moving equipment. Safe use of this equipment is of prime importance. Most injuries can be prevented by simply following proper procedures and manufacturer’s guidelines. Trouble comes from taking shortcuts because workers are in a hurry or too impatient to do the job safely.
Farm Field Equipment Safety Checklist
Guard PTO shafts over the stub area on the tractor with a master shield.
Guard power transmission components like shafts and couplers, belts and pulleys, and chains and sprockets to prevent contact with moving parts.
Guards must be installed to cover the unused portions of functional components. Examples of functional components include conveying augers, feed rolls, snapping and husking rolls, flail rollers, rotary tillers, and straw spreaders and choppers.
Part 7C – All Terrain Vehicles
All-Terrain Vehicles (ATV) and Off-Road Vehicles (ORV) can be an efficient and economical substitute for pick-up trucks, horses, tractors and even walking in many agricultural and industrial operations. They are used to inspect crops, livestock and check irrigation, and by farm supervisors in the field. They are found on all types of farms, ranches, groves, forestry operations, nurseries, greenhouses and other operations.
However, the ATV is one of the most abused farm implements. This vehicle’s improper use has been the cause of everything from minor scrapes and scratches to deaths. You can eliminate ATV accidents by following a few important operating rules and procedures. Always require employees to follow a safety policy.
ATV operators must:
Receive operator safety training prior to driving an ATV. Review the operator’s manual during training when one is available.
Inspect the vehicle for unsafe conditions and ensure routine maintenance has been performed.
Dress properly and wear appropriate gear, which includes helmet, goggles, gloves, over-the-ankle boots, long-sleeve shirt and long pants.
Always be aware of safe speed, terrain and visibility.
Never allow any passengers.
Avoid steep banks and hills whenever possible.
Do not operate on streets, highways or paved roads.
Maintain the equipment in good working order, check brakes, steering, tires, lights, etc.
Added attachments may affect ATV stability, operation or braking. Choose cautiously.
Proceed with caution if you are not sure of terrain in front of you.
Never attempt stunts.
Never operate ATV while under the influence of alcohol or drugs.
For more information see WRD 5.92, Head Protection and ATVs.
Part 7D – Transporting Farm Field Equipment
When transporting or moving equipment, observe the width, height and length of the equipment you are operating. Know the area you are operating in and any associated hazards like steep embankments, irrigation ditches, loose ground and overhead electrical lines.
Using public roadways requires special precautions:
You must ensure that all farm tractors and other slow-moving farm vehicles and equipment used on public roads have lamps, reflectors and a slow-moving vehicle (SMV) emblem.
The SMV emblem must be used on equipment traveling on public roads and designed to travel 25 mph or less.
From one-half hour after sunset to one-half hour before sunrise, slow-moving vehicles must have lights and reflectors.
Consider the use of a pace vehicle with flashing lights in front or back of the tractor or implement to heighten the visibility of the equipment moving on the public roadway
Part 7E – Forklifts
Powered industrial truck (or “forklift”) means a fork truck, industrial tractor, platform lift truck, motorized hand truck, or other specialized industrial trucks, powered by electric motors or internal combustion engines. The definition does not include compressed gas-operated industrial trucks, tractor-mounted forklifts or vehicles intended primarily for earth moving or over-the-road hauling.
A forklift is a powerful tool which allows someone to move, lift and place heavy loads with little effort. Using a tool such as a forklift, cart or hand truck instead of carrying heavy items by hand greatly reduces the risk for back injuries. However, forklifts can be dangerous tools when a forklift operator:
Is not properly trained;
Is not familiar with the how a particular forklift operates;
Operates the forklift carelessly; or
Uses a forklift that is not safe due to malfunctioning or missing parts.
Forklift operators must be trained. An untrained operator of a forklift is as dangerous as an unlicensed operator of a motor vehicle.
Training has three parts:
Formal instruction such as a lecture, discussion, interactive computer learning, videotape or written material (can be taken anywhere);
Practical training that includes hands-on demonstrations by the trainer and exercises by the trainee (on the model of forklift the worker will use); and
An evaluation of the effectiveness of the training by observing the operator’s performance while doing actual work using the forklift. This evaluation must be repeated at least once every three years (must be at workplace).
See WAC 296-307-52029 for training requirements.
Safe Forklift Operations
Driving a forklift is different than driving a car. A forklift has the steering wheels in the rear which can make maneuvering the forklift tricky. Additionally, a forklift center of gravity can easily change when traveling or lifting a load, making forklifts at risk of tipping over. Seatbelt use is critical to keeping the operator in the cage of the forklift should it tip over.
To prevent your forklift from tipping over, falling sideways or dropping its load:
Make sure the load is stable and safely arranged on the forks.
Do not tilt the forks forward except when picking up or depositing a load.
Tilt the load backward only enough to stabilize the load.
Keep the load low, just above the pavement with forks tilted back when traveling.
Cross railroad tracks diagonally when possible.
Enter elevators squarely.
Keep the load uphill when going up or down an incline.
Drive at a speed that will allow you to stop safely.
Slow down on wet or slippery surfaces and to make turns.
Avoid driving over loose objects or on surfaces with ruts and holes.
The basic rule for traveling is that you maintain control of the forklift at all times.
Other rules include:
Operate a forklift only while in the seat or operator’s station. Use the seatbelt. Never start it or operate the controls while standing beside the forklift.
Never allow passengers unless the forklift was designed for a passenger.
Do not put any part of your body between the uprights of the mast or, when traveling, outside of the forklift frame.
Always look in the direction of travel and keep a clear view of the travel path. Travel in reverse if the load blocks your view.
Always observe posted speed limits at your workplace. A forklift should not be driven faster than a quick walking pace.
Keep a distance of at least three forklift lengths between you and any forklift traveling in front of you.
Do not pass a forklift traveling in the same direction if it is at a blind spot, intersection or other dangerous location.
Never drive a forklift up to anyone in front of a bench or other fixed object.
Never allow anyone to walk or stand under the elevated forks — even if the forks are not carrying a load.
Check that there is adequate clearance under beams, lights, sprinklers and pipes for the forklift and load to pass.
When lifting and lowering people, use only approved lifting platforms.
Secure trucks or trailers with wheel chocks or locks when moving a forklift onto them.
Never engage in stunt driving or horseplay.
Pre-Use Inspections
The forklift must be checked for defects daily, usually by the operator before beginning a shift. Even if you operate a forklift safely, a defect can cause or contribute to a serious accident. Mark unsafe forklifts “Out-of-Service.”
Carbon Monoxide Hazards
Gas/propane powered forklifts produce carbon monoxide. This gas can rapidly build up in any indoor area. People can be overcome without even realizing they are being exposed. Confusion, headache, dizziness, fatigue and weakness may set in too quickly for victims to save themselves. Make sure forklifts are operated in a well-ventilated area. Consider the use of electric forklifts in indoor areas that cannot be adequately ventilated.
Part 7F – Irrigation Safety
Overhead Power Lines
Farming operations that have employees working around overhead power lines need to be cautious. Always look up before beginning any farm activity, especially when moving equipment or lifting objects up in the air.
Use the 10-Foot Circle of Safety Rule: Keep everything — people, tools, materials and equipment — at least 10 feet away from all overhead power lines. Higher voltage lines require more distance.
Isolate all exposed overhead conductors from accidental contact by employees or equipment.
Irrigation pipe must not be stored within 100 feet of overhead conductors. Also, keep hay bales away from power lines.
Never stand an irrigation pipe on end near a power line. Upending irrigation pipe within 100 feet of overhead conductors is prohibited.
Water and irrigation systems, and other devices that discharge a conductive liquid, must be set up and operated so that the discharge from the system is directed more than 10 feet away from overhead highvoltage lines and avoids contact with any exposed electrical power conductor. Do not spray water on power lines, equipment or structures. Not only can it damage the equipment and short the electrical system, a stream of water hitting a power line can create a path for electricity.
Locate irrigation pumps at least 100 feet away from overhead lines. This distance will provide a safe area if you have to pull your pumping or well equipment for repairs.
Prohibit employees from entering or working in proximity to high-voltage lines unless there are guards to prevent accidental contact.
Use caution when moving equipment near power poles:
Beware of hooking guy wires when moving equipment. Keep vehicles, tools, pipes and people clear of guy wires at all times. If you strike a guy wire or pole, call the local utility company.
Always lower equipment, tools and pipes before moving them anywhere near power lines. When you do move equipment near power lines, have someone spot for you.
If your tractor, truck, combine or other equipment comes into contact with a power line, stay on board to remain safe. Be sure to warn others to stay away from the area. If the equipment is operable and can be moved out of contact without doing additional damage to the line or poles, do so.
As long as the equipment is in contact with a line, do not step off the equipment. If you must get off because of fire or another emergency, jump clear of the equipment with both feet together, making sure that you are never in contact with the equipment and the ground at the same time. Once off the equipment, hop away, keeping both feet together.
Drowning Dangers and Prevention
There are a number of drowning hazards in agriculture, so be aware of the risk and how to protect people.
Irrigation canals or ditches: Avoid entering them. There can be quick moving water and deep water that has undertows or other hazards. Steep slopes and slippery walls can create falling hazards. If you must go into the irrigation canal or ditch, use a lifeline and make it a two-person job. Have a life ring with 90 feet of line attached for standby.
Farm ponds and cisterns: When practical, fence and post warning signs around ponds and cisterns to prevent unauthorized entry. Consider installing a rescue post with a life ring if the pond is used for swimming or people go out into the pond for maintenance on equipment.
Liquid manure and slurry storage pits, ponds, lagoons or tanks: When possible, place lids on manure pits and tanks. For above-ground manure-storage structures, fence and place warning signs such as “Keep Out” or “Danger! Manure Storage.” During warm weather, open manure lagoons can appear deceptively solid.
Water-filled well tailings pits: Fence and post warning signs. Design and construct the pit so a person could escape if they fell in.
Wells: Cover securely and post warning signs. If you are required to enter, follow confined space rules. Old, unused wells should have solid covers that can’t be easily removed. If possible, fill in old wells to completely remove the hazard.
Lakes, reservoirs, rivers and streams: If appropriate, fence and post warning signs at potential access areas. If using diving equipment to enter bodies of water for underwater commercial diving work, follow rules regulating commercial diving. Remember, in cold water the body loses heat fast and hypothermia, or lowered body temperature, can cause death.
PART 8 General Equipment Safety
Machines and their moving parts create the potential for workplace injuries. Installed and used properly, safeguards can protect workers by helping to reduce or control machine hazards.
Part 8A – Power Transmission Machinery
Power transmission parts: The mechanical components of a piece of equipment that, together with a source of power (sometimes referred to as a prime mover), provide the motion to a part of a machine or piece of equipment. Some examples are shafts, flywheels, chain drives, sprockets, pulleys and belt and rope drives.
Guards on a machine: A barrier that prevents the hands or other body part from reaching through, over, under or around the guard into the hazard area. A guard prevents objects or debris from falling onto or being ejected towards an employee.
Nip-point belt and pulley guard: A device that encloses the pulley and has rounded or rolled edge slots through which the belt passes.
Guarded by location: The location of a component eliminates potential hazards. A component 7 feet or more above a working surface is considered guarded by location.
Shafting: Revolving shafts that must be protected by a standard safeguards such as physical guards secured against excessive end movement or by location.
Projecting shaft ends: Must have a smooth edge and end and must not project more than one-half the diameter of the shaft unless guarded by non-rotating caps or safety sleeves.
Unused keyways, setscrews and other projections: Must be filled up or covered.
Collars and couplings: All revolving collars, including split collars, must be cylindrical.
Screws or bolts used in collars must not project beyond the largest periphery of the collar.
Shaft couplings must be constructed to prevent hazard from bolts, nuts, set screws or revolving surfaces.
Bolts, nuts and set screws are permitted where they are covered with safety sleeves or where they are used parallel with the shafting and are countersunk or where they do not extend beyond the flange of the coupling.
Belt, rope and chain drives: Must be protected by standard safeguards or by location.
Gears: Protect gears with a complete enclosure, a standard guard or a band guard covering the face of the gear with flanges extending inward beyond the root of the teeth on the exposed side or sides. For lubrication, provide openings with hinged or sliding self-closing covers. Provide oil feed tubes if lubricant is added while machinery is in motion.
Make sure guards:
Do not create additional hazards such as sharp edges or pinch points between the guard and moving machine parts.
Are made of durable materials strong enough to withstand the forces to which they are exposed.
Are securely fastened to the machine, if possible, or to the building structure if they cannot be attached to the machine.
See WAC 296-307-28044 through 296-307-28068 for additional detail.
Part 8B – Conveyors and Augers
“Augers” means screw conveyors and related accessories designed primarily for conveying agricultural materials on farms.
Requirements Applying to Conveyors
Conveyors must be constructed, operated and maintained according to ANSI B 20.1-1957.
Conveyors must have an emergency stopping device that can be reached from the conveyor. The device must be located near the material entrance to each chopper, mulcher, saw or similar equipment. The device must be located so that it can stop the conveyor before an employee enters the point of operation of the machine fed by the conveyor.
If a conveyor operates within 7 feet of the floor, there must be a trough strong enough to carry the weight resulting from a broken chain.
If the conveyor is over a passageway, provide a means to catch and support the ends of the chain in the event of a break.
When the conveyor crosses within 3 feet of the floor through passageways, provide a crossing platform to cross over the conveyor.
Install protective guards whenever conveyors pass adjacent to or over working areas or passageways. These guards must be designed to catch and hold any load or materials that may fall off or dislodge and injure an employee.
Prohibit walking on moving conveyors. Conveyors must be shut off.
Install guards, screens or barricades that are strong enough to prevent material from falling.
Provide safe access for inspection and maintenance of conveyors.
Inspect conveyors for wear and damage. Replacement parts must be equal to or exceed the manufacturer’s specifications.
Requirements Applying to Auger Conveying Equipment
All power takeoff shafts and augers must be covered or guarded when exposed to contact.
A sweep auger must have its top half shielded by a guard. All guard openings must be no larger than 4 ¾ inches across.
An exposed auger at the hopper and the intake must be guarded or designed to prevent accidental contact with the rotating inlet area. The guard must extend at least 2 ½ inches above and below the exposed auger. Openings in the guard, for the free flow of material, must be no larger than 4 ¾ inches across and must be strong enough to support 250 pounds at mid-span.
The winch must have a control that will hold the auger at any angle and that will only respond to the control. The operator must be able to lower the auger without disengaging the control.
Wire rope-lifting pulleys must be grooved to fit the wire rope used.
Provide the auger operator with service and operation instructions that include safe operation and servicing practices.
Part 8C – Fan Blade Guarding
You must guard the blades of a fan located less than 7 feet above the floor or working level. The guard must have maximum openings of one-half inch. Exception: This requirement does not apply to combines when guards could create fire hazards.
PART 9 Maintenance and Servicing of Equipment
Part 9A – Electrical Servicing
Workers who face the risk of electrical shock must be:
Fully trained.
Qualified to work on live electric circuits.
Familiar with the proper use of special precautionary techniques, personal protective equipment, insulating and shielding materials, and insulated tools.
Training contents must include the safety-related work practices required by WAC 296-307-376 through 296-307-378 that apply to their job assignments. Qualified persons must have the skills and techniques to:
Distinguish exposed live parts from other parts of electric equipment.
Determine the nominal voltage of exposed live parts and the clearance distance specified in WAC 296-307-376 and the corresponding voltages to which the qualified person will be exposed.
Part 9B – Lockout/Tagout (LOTO)
Lockout/Tagout (LOTO) is required:
During the servicing and maintenance of machines and equipment in which the unexpected startup of the machine or equipment or release of stored energy (see WAC 296-307-320).
When an employee is required to remove or bypass a guard or other safety device or is required to place a part of their body into a point of operation or where an associated danger zone exists during a machine operation cycle.
Affected workers (employees who work around machinery/equipment) must:
Be trained in the employer’s written LOTO program.
Follow the written LOTO program.
Authorized workers (employees who service or maintain machinery/equipment) must:
Be trained in the employer’s written program and specific LOTO procedures before they can lockout a piece of equipment.
Follow the specific LOTO procedures.
Know all of the following before a machine or equipment is turned off: --Type and magnitude of the energy --Hazards of the energy to be controlled --Method or means to control the energy
General LOTO Procedures
Turn off or shut down the machine or equipment in an orderly manner using established procedures.
Completely isolate the machine or equipment from its energy sources using the appropriate energy-isolating devices.
Authorized employee must notify affected employees that the machine or equipment is being locked or tagged out before the devices are applied.
A LOTO device must be applied for each energy-isolating device and only by the authorized employee.
Make sure all potentially hazardous stored and residual energy is relieved, disconnected, restrained, or otherwise rendered safe.
Verify the isolation of machines and equipment that could re-accumulate stored energy to a hazardous level until:
--Service or maintenance is completed.
--The possibility of re-accumulating hazardous energy doesn’t exist.
Make sure only the authorized employee who applied an LOTO device removes it. Before removing the LOTO device:
--Inspect the work area to make sure nonessential items have been removed.
--Verify the machine or equipment is in operating condition and ready to energize.
--Check that employees in the area are in positions that make it safe to energize the machine or equipment.
Group LOTO
Make sure each authorized worker puts a personal lockout device on the group lockout device before the start of work (example: lock on a group lockbox).
Locks can be removed only when each authorized worker has finished work on the machine or equipment.
PART 10 Shop Tools and Equipment
Part 10A – Training
Train all workers at the time of initial assignment and at least annually. Instruct every employee in the safe operation and servicing of all equipment the employee will use, including at least the following:
Keep all safety guards in place when the machine is in operation.
Stop engine, disconnect the power source, and wait for all machine movement to stop before servicing, adjusting, cleaning or unclogging the equipment.
When the machine must be running to be properly serviced or maintained, you must instruct employees in the steps and procedures necessary to safely service or maintain the equipment.
Lock out equipment before performing maintenance or service.
Make sure everyone is clear of machinery before starting the engine, engaging power, or operating the machine.
Part 10B – Hand-held Power Tools
Power-driven tools must have a “dead-man” control, such as a spring-actuated switch, valve, or equivalent device, so that the power will be automatically shut off whenever the operator releases the control.
Hand-held power tools must be grounded.
Guarding Portable Powered Tools
Power-driven circular saws with a blade diameter greater than 2 inches must have guards above and below the base plate or shoe.
The upper guard must cover the saw to the depth of the teeth, except for the minimum arc required to permit the base to be tilted for bevel cuts.
The lower guard must cover the saw to the depth of the teeth, except for the minimum arc required to allow proper retraction and contact with the work.
When the tool is withdrawn from the work, the lower guard must automatically and instantly return to covering position.
Portable belt sanding machines must have guards at each nip point where the sanding belt runs onto a pulley.
--Guards must prevent the hands or fingers of the operator from coming in contact with the nip points.
--The unused run of the sanding belt must be guarded against accidental contact.
Portable Grinders
Safety guards on right angle head or vertical portable grinders must have a maximum exposure angle of 180 degrees, and the guard must be between the operator and the wheel during use.
Other portable grinders must be guarded so that only the bottom half of the wheel is exposed. The top half of the wheel must be enclosed at all times.
Chain Saws
Before Operations
--Always review operator instructions before you use a chain saw.
--Wear snug fitting clothing; don’t wear any jewelry.
--Wear appropriate personal protective equipment for hearing, eyes, foot, leg and head protection.
--Always check for defects in the saw. Replace all defective parts before operating the tool.
--Don’t use a saw with a dull blade.
--Check the item to be cut for nails, wire and any other metal-imbedded items.
--Before cutting, plan a path of retreat.
During Cutting
--When cutting, keep the saw away from your body.
--Never cut anything directly overhead.
--Be wary of materials to be cut that may be under tension.
--Be careful to avoid pinching the blade or guide bar.
--As the material begins to fall, turn off the saw and move away quickly.
--Watch for a rebound or kickback.
After Cutting
--Allow the saw to cool before refueling.
--Don’t operate the saw near your refueling area.
--Check the operator instructions for any special after-operations maintenance instructions.
Compressed Air and Pneumatic Powered Tools
Airlines, hose and hose connections used for conducting compressed air to utilization equipment must be designed for the pressure and service to which they are subjected. PVC, water lines and other materials not approved for compressed air are prohibited.
The operating trigger on portable pneumatic powered tools must be located to minimize accidental operation and to close the air inlet valve automatically when the operator removes pressure.
A tool retainer must be installed on each tool that would otherwise be ejected from the hose.
Using compressed air for cleaning purposes is prohibited, except where the pressure is reduced to less than 30 psi, and then only with effective chip guarding and PPE.
When using compressed air tools, use care to prevent the tool from being shot from the gun.
When momentarily out of use, the gun should be laid so that the tool cannot fly out if the pressure is accidentally released. When not in use, all tools should be removed from the gun.
Shut off the pressure before disconnecting a compressed air tool from the air line, and then operate the tool to release the pressure remaining in the hose.
Compressed air hoses or guns must not be pointed at or brought into contact with the body of any person.
Part 10C – Stationary Shop Tools and Equipment
Machine Controls
One or more “stop” buttons (red or orange) must be provided on the machine within reach of the operator.
“On” and “off” must be marked. Control devices must be marked to indicate the function and machine they control.
“Start” buttons must be recessed.
Power control devices must be located or guarded to prevent unexpected or accidental startup or activation.
Powered Saws
Remove cracked saw blades from service.
Use only approved blades for rabbeting or dadoing.
Use push sticks or push blocks in sizes and types suitable for the work to be done.
Band Saw
Enclose or guard all portions of the blade except for the working portion of the blade between the guide rolls and the table.
Make sure the guard protects the front and outer side of the blade and is adjusted as close as possible to the material being cut.
Fully enclose band-saw wheels with wheel guards.
Radial Arm Saw
Make sure the radial saw has a hood that does all of the following:
--Completely encloses the upper portion of the blade down to a point that includes the end of the saw arbor.
--Protects the operator from flying splinters and broken saw teeth.
--Deflects sawdust away from the operator.
Provide a lower blade guard that does all of the following:
--Guards the sides of the lower exposed portion of the blade to its full diameter.
--Automatically adjusts to the thickness of the stock being cut.
--Remains in contact with the stock to provide the maximum protection possible for the operation being performed.
Table Saw
Guard each saw with a hood that completely encloses both the portion of the saw that is above the table and the material being cut.
Provide kickback protection and spreader when ripping wood.
Guard the part of the table-saw blade that is beneath the table.
Guard the power transmission components.
Bench Grinders, Abrasive Wheels and Portable Grinders
Goggles or face shields must be used when grinding.
Use abrasive wheels only on machines that have safety guards.
Mount the safety guard so it maintains proper alignment with the wheel, and use fasteners strong enough to keep the guard in position if a wheel breaks.
Covers the spindle end, nut and flange projections.
Position the safety guard before starting the mounted wheel.
Inspect and sound (ring test) all wheels before mounting the wheel.
Check the spindle speed of the machine to be certain that it does not exceed the maximum operating speed marked on the wheel.
Keep contact surfaces of wheels, blotters and flanges flat and free of foreign matter.
On offhand grinding machines, work rests must be used to support the work.
--The work rest must be rigid and adjustable to compensate for wheel wear and kept adjusted to the wheel with a maximum opening of one-eighth inch.
--The adjustable tongue or the guard above the wheel must not exceed one-quarter inch.
Securely mount bench grinders.
Grinders or abrasive wheels that vibrate or are out of balance must be repaired before use.
Abrasive wheels not designed for the machine or safety guard must not be used.
Side grinding must only be performed with wheels designed for this purpose.
Part 10D – Mowing Equipment
Power Lawnmowers
Use according to manufacturer’s instructions.
All power-driven chains, belts, gears and mower blades must be safeguarded.
The motor must have a shut-off device that requires manual and intentional reactivation to restart the motor.
All positions of the operating controls must be clearly identified.
Guards that must be removed to install a catcher assembly must meet the following requirements:
--Warning instructions are attached to the mower near the opening stating that the mower must not be used without either the catcher assembly or the guard in place.
--The mower is used only with either the catcher assembly or the guard in place.
--The horizontal angle of the grass discharge opening(s) in the blade enclosure must not contact the operator area.
Mower handles must be locked in the normal operating position(s) so that they cannot be accidentally disengaged during normal mower operation.
Walk-behind rotary mowers must have a positive constant-pressure device that requires the operator to hold the device in the “on” position to operate the mower. Using rope or string or other material to tie the constant pressure device in the “on” position is prohibited.
Riding Rotary Mowers
Mowers must have stops to prevent jackknifing or locking of the steering mechanism.
The mower must have brakes.
Part 10E – Jacks
Follow the manufacturer’s specifications to raise the rated load of a jack.
The operator must make sure that the jack used has a load rating sufficient to lift and sustain the load.
The rated load must be legibly and permanently marked in a prominent location on the jack by casting, stamping, or other suitable means.
Operation and Maintenance of Jacks
If the foundation is not firm, you must block the base of the jack. If the cap might slip, you must place a block in between the cap and the load.
Watch the stop indicator, which must be kept clean, in order to determine the limit of travel. The indicated limit must not be overrun.
After the load has been raised, it must immediately be cribbed, blocked or otherwise secured. Working under a load raised only with jacks is prohibited. Hydraulic jacks exposed to freezing temperatures must be supplied with adequate antifreeze liquid.
Follow the manufacturer’s instructions for lubrication.
Inspect according to the service conditions and at least:
--For constant or intermittent use at one locality, once every six months.
--For jacks sent out of shop for special work, when sent out and when returned.
--For a jack subjected to abnormal load or shock, immediately before and immediately thereafter.
Repaired or replaced parts must be examined for possible defects.
Jacks that are out of order must be tagged and not be used until repaired.
Part 10F – Welding Operations
Storage and Handling of Gas Cylinders
Keep gas and oxygen cylinders at least 20 feet apart when not in use. Or separate them with a proper firewall (a noncombustible barrier at least 5 feet high with a fire-resistance rating of at least one-half hour). Store cylinders away from other flammable and combustible materials.
Keep cylinders away from physical damage, heat and tampering.
Store cylinders in an upright position. Chain them securely to keep them from falling over. Chain the welding rig securely to prevent it from falling as well.
Do not transport acetylene cylinders on their side.
Close cylinder valves before moving.
Protective caps or regulators must be kept in place.
Roll cylinders in an upright position on bottom edges to move. Do not drag or lay down.
Minimize cylinder movement when transporting.
Never expose gases to oil or grease.
Shielding
Arc welding and cutting operations must be shielded by noncombustible or flameproof screen which will protect employees and other persons working in the vicinity from the direct rays of the arc.
General Gas Welding
Lift gas cylinders only with equipment designed for that use. Inspect torches and clean only with the proper tools.
Use only torches that have blow-back protection.
Inspect hoses for leaks and worn places. Inspect equipment for leaks at all connections using approved leak-test solution. Replace bad hoses.
Have a fire extinguisher easily accessible at the welding site.
Protect hoses and cylinders from sparks, flames and hot metal.
Use a flint lighter to ignite the flame.
Stand to the side (away from the regulators) when opening cylinder valves.
Use two-stage regulators whenever possible.
When using a single-stage regulator, open cylinder valves very slowly. This keeps sudden high pressures from exploding the regulators.
When using a single-stage regulator, only open the acetylene cylinder valve 1/4 to 3/4 turn.
Leave the wrench in place. That way, you can close the cylinder quickly in an emergency.
Open and light the acetylene first. Then open and adjust the oxygen to a neutral flame.
When shutting off the torch, close the acetylene torch valve first. You might hear a pop as the oxygen blows out the flame, but the flame will not burn up the acetylene line.
When finished:
--Close cylinder valves.
--Bleed the lines to take pressure off the regulators.
--Coil hoses neatly.
Personal Protection Equipment (PPE)
Infrared radiation can cause retinal burning and cataracts. Protect your eyes with safety glasses.
Protect your body from welding spatter and arc flash with protective clothing:
--Gloves. --Woolen clothing (possibly cotton) — never synthetic!
--Welding jackets, fireproof apron, or leathers to protect specific body parts.
--Fire-resistant cape or shoulder covers for overhead work.
--Properly fitted clothing that is not frayed or worn.
--Long-sleeved shirts.
--Straight-legged trousers that cover shoes.
Check protective clothing equipment before each use. Make sure it is in good condition.
Keep clothes free of grease and oil.
Proper Ventilation
Be sure there is adequate ventilation available when welding in confined areas or where there are barriers to air movement. Natural drafts, fans and positioning of the head can help keep fumes away from the welder’s face.
Fire Prevention
Move objects to be welded, cut, or heated to a designated safe location or, if these objects cannot be readily moved, move fire hazards in the vicinity to a safe place or protect them.
No welding, cutting or heating where the application of flammable paints or the presence of other flammable compounds, or heavy dust concentrations creates a hazard.
Suitable fire extinguishing equipment should be available in the work area.
PART 11 Ladders
Fixed ladder: A ladder that cannot be readily moved or carried because it is an integral part of a building or structure.
Portable ladder: A ladder that can be readily moved or carried.
Orchard ladder: A three-legged portable ladder used in orchards that can be readily moved or carried.
Part 11A – Ladder Safety Guidelines
The following apply to all ladders:
A competent person must train employees to recognize ladder hazards. At the beginning of employment, ensure that all employees get an orientation and training on the proper use of ladders, including how to set a ladder and properly dismount with a full load.
Do not climb up or down ladders while carrying tools or materials that interfere with the free use of both hands.
Face the ladder when climbing up and down. Both hands must be on the ladder when climbing up or down the ladder.
Follow manufacturer’s recommendations for:
--Blocking and securing the ladder.
--Rated load capacity.
If a ladder shows any of these signs of an unsafe condition, remove it from service:
--Is the ladder damaged, broken, bent, or delaminated?
--Does it lack structural integrity, have broken treads or rails?
--On extension ladders, do the rung locks function?
Never use a ladder or any other tools within 10 feet of energized electrical equipment such as power lines.
Ladders must not be placed on boxes, barrels or other unstable bases to obtain additional height.
Part 11B – Fixed Ladder Safety
A fixed ladder must be capable of supporting at least two loads of 250 pounds each, concentrated between any two consecutive attachments. Fixed ladders also must support added anticipated loads caused by ice buildup, winds, rigging and impact loads resulting from the use of ladder safety devices.
Fixed ladders must be secured to the building or structure.
Fixed ladders over 20 feet tall must have a safety cage surrounding the ladder.
The safety cage should have 15 foot clearance to all points from the center.
Defects in fixed ladders should be repaired as soon as possible.
Fixed ladders without cages or wells must have at least a 15-inch-clear width to the nearest permanent object on each side of the centerline of the ladder.
Keep the top and base areas of a ladder clear of obstructions.
Make sure the side rails of through or stepside ladders extend 42 inches above the top of the access level or landing platform.
Part 11C – Portable Ladders
Place the ladder for a 1:4 lean ratio: 1 foot out for every 4 feet up.
Extension ladders must be secured at top.
Never use an aluminum ladder or any other tools within 10 feet of energized electrical equipment such as power lines.
One way to ensure proper angle is to
stand with your feet at the base of the
ladder and extend your arms straight out.
If your hands just touch, the ladder will
be very close to the 4 to 1 ratio.
Extension ladders should be long enough that you stand below the third rung from the top. When accessing an upper level, properly extend the extension ladder at least 3 feet above the upper surface to allow a handhold for safe transition. Ladders must not be placed on unstable bases to obtain additional height.
Step ladders must be set up to safely perform work without standing on the last rung or the top cap. Stepladders must not be used as straight ladders.
Ladders made by fastening cleats across a single rail are prohibited.
Part 11D – Orchard Ladders
Ensure that employees are instructed before climbing ladders.
Rungs, shoes and boots must be clean of substances that would make them hazardous.
Ensure that employees are instructed not to step off the ladder onto branches of trees, except onto the main crotch.
Only one person at a time may climb or stand on an orchard ladder.
Never sit on an orchard ladder, and do not stand on the top two steps of an orchard ladder.
Position straight orchard ladders so they are facing into an uphill or downhill slope.
When positioning a tripod orchard ladder, the steps should be level and the tripod leg should extend straight from the center line of the ladder. Where possible, the tripod leg should be placed on level ground. On sloping land, position the tripod leg uphill. When positioning the ladder across the land slope, locate the tripod leg slightly downhill.
Position the straps of the fruit sack or bucket to evenly distribute the picked crop weight, and maintain a stable posture on the orchard ladder.
Carefully remove fruit from the tree to prevent being poked by branches or hit by rebounding branches.
Do not overreach! Avoid reaching too high above your head or too far to the side while standing on an orchard ladder. Climb to a higher step or move the ladder closer to the tree fruit if you are beginning to reach above your head or lean out past the ladder rails.
Part 11E – Ladder Inspection Checklist
Ladder No.: __________
Location: ________
Date Purchased: __________
Type of Ladder:___________
Length of Ladder: __________
Material: Wood Metal
Dates of Inspection _________________
Rungs (loose, movable by hand)?
Acceptable
Unacceptable
Nails, screws, bolts or other metal parts (loose)?
Acceptable
Unacceptable
Uprights, braces and rungs (in good condition)?
Acceptable
Unacceptable
Wooden parts (smooth, no splinters)?
Acceptable
Unacceptable
Non-slip safety feet (in proper condition)?
Acceptable
Unacceptable
Ladder (stable)?
Acceptable
Unacceptable
Hinge spreaders (tight, straight)?
Acceptable
Unacceptable
Hinge spreader stops (functioning correctly)?
Acceptable
Unacceptable
Hinges (tight)?
Acceptable
Unacceptable
Extension locks (in place, in good condition)?
Acceptable
Unacceptable
Rope (undamaged)?
Acceptable
Unacceptable
Identification marks (legible)?
Acceptable
Unacceptable
Ladder (stored properly when not in use)?
Acceptable
Unacceptable
PART 12 Toilets, Hand-washing and Water (Field Sanitation)
Employers must provide employees with toilets, hand washing facilities and drinking water at no cost in fixed places of employment and field operations.
Prior to beginning work, employers must provide an orientation that is understandable to all employees and includes:
The location of drinking water supplies and the importance of drinking water frequently, especially on hot days.
Identification of all non-drinking water at the worksite, prohibition of the use of nondrinking water for sanitation purposes with an explanation of the hazards associated with using non-drinking water.
The location of hand-washing facilities and the importance of hand-washing.
The location of toilet facilities and an explanation that facilities are for employee convenience and health.
The necessity to keep them clean and that using the fields, orchards or forests is not an option.
Part 12A – Toilets
Provide toilets for employees engaged in hand-labor operations in the field and fixed establishments.
Toilet must meet the following requirements:
One toilet facility is provided for each 20 employees or fraction of 20.
Toilet facilities are near hand-washing facilities and within one-quarter mile of each employee’s worksite in the field. Exception: Where it is not feasible to locate facilities as required above, the facilities must be located at the point of closest vehicular access.
Ensure, at the beginning of each day, that the toilets are inspected to ensure they are clean and working. If any toilet is not clean or working, take immediate action. Document inspection and maintain the record at the worksite for at least 72 hours. Toilets are adequately ventilated, appropriately screened and have self-closing doors that can be closed and latched from the inside. Toilets are constructed to ensure privacy.
Toilets are supplied with toilet paper.
Disposal of wastes from the facilities does not create a hazard or cause an unsanitary condition.
Employees are allowed reasonable time during the work period to use the facilities.
Part 12B – Hand Washing
Provide hand-washing facilities for employees engaged in manual labor operations in the field and fixed establishments. Hand-washing facilities must meet the following requirements:
One hand-wash with a tap and an adequate supply of water, soap, single-use hand towels and either a basin or other suitable container for washing is provided for each 20 employees or fraction of 20.
Facilities are maintained in a clean and sanitary condition.
Waste receptacles are provided.
Employees are allowed reasonable time during the work period to use the facilities.
Hand-washing facilities are near toilet facilities and within one-quarter mile of each employee’s worksite in the field. Exception: Where it is not feasible to locate facilities as required above, the facilities must be located at the point of closest vehicular access.
Part 12C – Drinking Water
An adequate supply of drinking water for employees engaged in manual labor operations in the field or fixed establishment must be provided.
Drinking water must meet the following requirements:
Water is in locations that are accessible to all employees.
Water containers are refilled daily or more often as necessary.
Water dispensers are designed, constructed, and serviced so that sanitary conditions are maintained. They are closeable and equipped with a tap.
Containers used to distribute drinking water are clearly marked in English and with the appropriate international symbol describing its contents.
Containers used to distribute drinking water are only used for that purpose.
Water is suitably cool and provided in sufficient amounts, taking into account the air temperature, humidity, and the nature of the work performed, to meet employees’ needs. Note: Suitably cool water should be 60 degrees F or less. During hot weather, employees may require up to 3 gallons of water per day. Additional requirements may be found in the outdoor heat exposure standard in Part G-1, WAC 296-307-09740 Drinking water, which applies between May 1 and Sept. 30 of each year.
The use of common drinking cups is prohibited. Water is dispensed in single-use drinking cups, personal containers or by water fountains.
PART 13 Weather Issues
Many agricultural activities occur in the outdoor environment. Protecting workers from environmental hazards is essential to preventing accidents like slips and falls, electrocutions, drowning and heat or cold-related illnesses.
Check weather forecasts and plan work activities accordingly. Have a communication system in place where workers can call in to find out the next day’s work schedule during potentially unsafe weather conditions.
Part 13A – Outdoor Heat Exposure
The requirements for protecting workers from outdoor heat exposure are in effect from May 1 through Sept. 30, annually. Heat stress occurs when the body is unable to cool itself quickly enough through sweating. This can cause heat-related illnesses such as heat exhaustion and heat stroke.
Employer Responsibilities
To determine employee heat exposure, use the following table. If the temperature level is reached, implement your heat-illness prevention procedures.
TABLE 1 - Outdoor Temperature Action Levels
All other clothing (general work clothing)
89°
Double-layer woven clothes including coveralls, jackets, and sweatshirts
77°
Non-breathing clothes including vapor barrier clothing or PPE such as chemcial resistant suits
52°
Address outdoor heat exposure in the written Accident Prevention Program.
Train employees. Additional recognition and emergency procedure training is required for supervisors.
Encourage employees to frequently consume water or other acceptable beverages.
Employee Responsibilities
Employees are responsible for monitoring their own personal factors for heat-related illness including consumption of water or other acceptable beverages to ensure hydration.
Notify your supervisor if you or your coworkers are experiencing symptoms of heatrelated illness.
Preventing Heat-Related Illness
Drink a lot of water, about 1 cup every 15 minutes.
Know the signs/symptoms of heat-related illness; monitor yourself and co-workers.
Block out direct sun or other heat sources.
Use cooling fans/air-conditioning; rest regularly.
Headaches, dizziness or light-headedness, weakness, mood changes, irritability or confusion, feeling sick to your stomach, vomiting, fainting, decreased and dark-colored urine, and pale, clammy skin.
What should you do?
Move the person to a cool, shaded area. Don’t leave them alone. If the person is dizzy or light-headed, lay them on their back and raise their legs about 6–8 inches. If the person is sick to their stomach, lay them on their side.
Loosen and remove heavy clothing.
Have the person drink some cool water (a small cup every 15 minutes) if they are not feeling sick to their stomach.
Try to cool the person by fanning them. Cool the skin with a cool spray mist of water or wet cloth.
If the person does not feel better in a few minutes call for emergency help (ambulance or 911.)
If heat exhaustion is not treated, the illness may advance to heat stroke.
Heat Stroke
What happens to the body?
Dry, pale skin, sweating may still be present; hot, red skin (looks like a sunburn); mood changes; irritability, confusion, and not making any sense; seizures or fits, and collapse (will not respond).
What should you do?
Call for emergency help (ambulance or 911.)
Move the person to a cool, shaded area. Don’t leave them alone. Lay them on their back and if they are having seizures, remove objects close to them so they won’t hit them. If the person is sick to their stomach, lay them on their side.
Remove heavy and outer clothing.
Have the person drink small amounts of cool water if they are alert enough to drink anything and not feeling sick to their stomach.
Try to cool the person by fanning them. Cool the skin with a cool spray mist of water, wet cloth or wet sheet.
If ice is available, place ice packs in armpits and groin area.
Part 13B – Rain, Lightning and Wind
Rain, lightning, and wind storms can cause accidents due to hazards from slippery surfaces, property damage, stranded equipment and electrical shock. If you encounter a severe storm, head for shelter immediately.
Here are some things to remember when encountering severe weather:
Rain
Wear appropriate footwear that won’t slip in wet conditions.
Wear appropriate rain gear that will keep you dry.
To protect equipment and prevent slipping and electrical shock, cover any materials, tools or equipment with plastic sheeting, tarps or other waterproof material.
Make sure drains and piping are regularly cleared of debris so they can drain work areas of water runoff.
When flash flooding occurs, avoid crossing creeks, rivers, bridges, and irrigation ditches. Head for higher ground immediately.
After heavy rains have occurred, check the ground to make sure it is stable enough for heavy equipment like tractors and trucks.
Lightning
Never climb a metal or aluminum ladder.
Don’t lift irrigation pipes or other metal objects into the air.
Don’t stand under a tree or metal structure during the storm.
Wind
Stay away from trees, power poles and the exterior windows of a building.
If you encounter downed power poles, stay away and contact the electrical service company.
During dust storms, protect your eyes with goggles or glasses and your lungs with a dust mask or cloth. Try to completely cover your body.
Avoid driving into dust storms. If you are caught in a dust storm, stay in your vehicle, turn on flashers, roll up the windows and turn off any vents that let in outside air.
Part 13C – Winter Weather
When the weather is extremely cold, and especially if there are high winds (wind chill), try to stay indoors. Make any trips outside as brief as possible, and remember these tips to protect your health and safety:
Dress Warmly and Wear:
A hat.
A scarf or knit mask to cover face and mouth.
Sleeves that are snug at the wrist.
Cold weather gloves.
Water-resistant coat and boots.
Several layers of loose-fitting clothing.
Stay Dry
Wet clothing chills the body rapidly. Excess perspiration will increase heat loss, so remove extra layers of clothing whenever you feel too warm. Do not ignore shivering. It’s an important first sign that the body is losing heat. Persistent shivering is a signal to return indoors.
Hypothermia
Prolonged exposure to cold will eventually use up your body’s stored energy. The result is hypothermia, or abnormally low body temperature. Hypothermia is most likely at very cold temperatures, but it can occur even at cool temperatures (above 40 degrees F) if a person becomes chilled from rain, sweat or submersion in cold water. Body temperature that is too low affects the brain, making the victim unable to think clearly or move well. This makes hypothermia particularly dangerous.
Frostbite
Frostbite is an injury to the body that is caused by freezing. Frostbite causes a loss of feeling and color in affected areas. It most often affects the nose, ears, cheeks, chin, fingers or toes. Frostbite can permanently damage the body, and severe cases can lead to amputation.
Avoid Slips and Falls When Walking on Icy and Snowy Surfaces
Wear the proper footwear for traction.
Walk slowly and take small steps to keep your center of balance under you.
Keep both hands free for balance. Use handrails.
Avoid carrying loads on stairways or ramps. Only carry loads you can see over.
Step — don’t jump from vehicles and equipment.
Keep walkways clear of debris, water, ice and slippery materials.
Winter Driving
Turn on your headlights. Avoid travel in low visibility conditions.
Slow down. Conditions may require you to drive much slower than the posted speed limit.
Provide extra distance between you and the vehicle in front since the stopping distance will increase in slippery conditions.
Carry chains in snowy areas.
If you must pull over, make sure you are completely off the road and turn on your flashers.
Equip your vehicle with a flashlight, ice and snow scraper, jumper cables, blankets, water, food, first-aid kit, cell phone and flares.
PART 14 Motor Vehicles/ Transporting Employees
Part 14A – Licensed or Trained Drivers
Only qualified drivers may operate motor vehicles and must have a current motor vehicle operator’s license. Employers should ensure that all drivers are trained and understand the rules of the road. All motor vehicles must have standard lights, horn, flags, flares and other safety equipment that conforms to the state of Washington motor vehicles laws.
Vehicles must be driven at safe operating speed and follow Washington State Traffic Laws.
Operate at a safe speed for roadway conditions.
Wear seat belts.
The employee must be assisted by a signaler when backing a truck or other farm vehicle and there is obstructed vision. The signaler must have a clear view of the rear of the truck and the operator of the truck.
Drivers must sound horn before starting to back and intermittently while backing.
Shut off motors before refueling. Take care to prevent fuel from spilling on hot parts or on the ground. No smoking while fueling.
Employees must report to you any motor vehicle or other farm equipment that is in unsafe operating condition.
You must ensure that the vehicle or equipment is removed from service and repaired before use.
You must ensure that motor vehicles have brakes that will safely hold the maximum load on maximum grades.
Loads transported on trucks or truck and trailer combinations must be properly secured. Do not exceed the safe operating load for the roadway condition and the capacity of the bridges, trestles and other structures.
Slow-Moving Vehicles
All farm tractors and other slow-moving farm vehicles and equipment used on public roads are required to have lamps, reflectors, and a slowmoving vehicle emblem. From one-half hour after sunset to one-half hour before sunrise, slowmoving vehicles must have lights and reflectors.
The slow-moving vehicle emblem is a fluorescent yellow-orange triangle with a dark red reflective border. The emblem must be used on public roads only by vehicles designed to move slowly (25 mph or less). Extra precautions must be taken when driving on public roads or near the shoulder of the road with slow moving vehicles. Never drive onto the soft shoulder. Have a Rollover Protection System and wear the seatbelt when traveling on public roads.
Part 14B – Transporting Employees
Ensure vehicles are well equipped, covered against the weather, and maintained in good mechanical condition at all times.
A sufficient number of properly secured seats must be provided in each vehicle to accommodate the number of employees transported. If emergency conditions make it necessary to transport more employees than the seating capacity can accommodate, all employees must ride within the vehicle.
No employee may ride on fenders or running boards of the vehicle.
No employees may ride in or on any vehicle with their legs hanging over the end or sides. All trucks without tailgates should have safety bars.
All dump trucks used to transport employees must have an adequate safety chain or locking device to ensure that the body of the truck is not raised while employees are riding in it.
Ensure that exhaust systems are installed and maintained in proper condition and are designed to eliminate employee exposure to exhaust gases and fumes.
Within the cab, crew trucks must carry only the number of passengers for which they are designed. In any seating arrangement, the driver must be able to maintain full freedom of motion.
All enclosed crew trucks must have an emergency exit in addition to the regular entrance.
Half-ton vehicles may haul no more than six persons including the driver.
Three-quarter-ton vehicles may haul no more than eight persons including the driver.
The vehicle must be equipped with first-aid supplies, two blankets and a fire extinguisher.
Part 14C – Maintenance and Vehicle Safety
Good vehicle maintenance is very important. A vehicle maintenance program will ensure that the vehicles you drive are operating safely and properly. In the end, you will have fewer mechanical problems and accidents and vehicles will be more efficient.
Preventive maintenance (PM) should be performed on a mileage or time basis. Typical PM includes oil/filter changes, lubrication, tightening belts and components, engine tune-ups, brake work, tire rotation, hose inspection/replacement and radiator maintenance.
A company’s vehicle selection, inspection and maintenance program is only as good as its recordkeeping procedures. Companies should have a vehicle safety coordinator who works with employees to organize and document vehicle maintenance.
Employer and employee must maintain all motor vehicles and their parts in good repair and safe condition.
You must not use tires that are worn beyond the point of safety.
Employees must report to the employer any motor vehicle or other farm equipment that is in unsafe operating condition. Employers must ensure that the vehicle or equipment is removed from service and repaired before use.
Before an employee performs service or repair work under hydraulic or mechanical raised dump truck beds, blades, discs, or other equipment, the raised portion of the equipment must be manually pinned or blocked to prevent falling.
PART 15 Preventing Strains and Sprains
There are three main causes of strains and sprains:
Awkward postures: reaching, bending, twisting, kneeling or squatting.
Hand intensive work: repetitive motions, forceful gripping and wrist bending.
Heavy physical work: lifting, carrying, pushing and pulling.
Awkward Postures
Awkward postures increase effort, cause fatigue and may result in injury. Awkward postures like bending, reaching and twisting are wasted motions that increase the time to do the job and reduce the quality of work.
Awkward postures happen when your work is too high, too low or too far away.
Good posture, working in a natural position, is less tiring and easier to do. It helps prevent sore muscles and helps prevents injuries to your back, shoulders, elbows, wrists, hands and knees.
Changing Awkward Postures into Good Posture
If the work is too high, can you:
Lower the work?
Use a platform to get closer to the work?
Use tools with longer handles to reach the work?
If the work is too low, can you:
Raise the work?
Sit on a low stool to get closer to the work?
Use tools with longer handles to reach the work?
Lean on something to support the weight of your upper body?
If the work is too far away, can you:
Bring the work closer?
Remove anything that keeps you from getting close to your work?
Use tools with long handles to pull the work closer to you?
More tips for working comfortably:
Do some warm-up exercises at the beginning of your shift and after lunch to increase flexibility and prepare your muscles for work.
Change positions frequently.
Rest tired muscles and use other muscles to do the work.
If you stand on a hard floor, use an anti-fatigue mat or add cushion insoles to your shoes.
Hand intensive work
A lot of different jobs require you to use your hands. Using your hands helps them to stay strong, but using them too much can cause injuries. Injuries can happen when you:
Repeat the same motion over and over with little time to rest.
Use a lot of force to grip objects using your whole hand.
Grasp with the tips of your fingers and thumbs, in a “pinch grip.”
Bend your wrists as you work with your hands.
To reduce repetitive motions, can you:
Eliminate any movements that aren’t necessary?
Reduce reach distances?
Use power tools or equipment?
Rotate jobs with a co-worker?
To reduce grip force, can you:
Grasp smaller, lighter amounts at one time?
Use two hands instead of one?
Use power tools?
Find a tool that fits your hand better?
Sharpen cutting tools often?
Move items on a cart instead of carrying them?
To reduce pinch grips, can you:
Grip with your whole hand instead?
Attach handles to provide a better grip?
Wear gloves with textured material to make objects easier to grip?
To reduce wrist bending, can you:
Change your position to keep your wrist straight?
Tilt or rotate your work to give you better access?
Use a different tool that doesn’t require you to bend your wrist?
Even if you can get rid of only some of the risks, you’ll be better off. For example, repetitive motions will be less likely to cause injury if you reduce the amount of hand force you use and keep your wrists straight.
Heavy physical work
Lifting, carrying, pushing and pulling are some of the most frequent causes of workplace injuries. Most injuries are to the muscles and joints, especially the lower back, shoulders and wrists. Heavy physical work also causes fatigue, which can make accidents more likely. Carrying, pushing and pulling things changes your balance and increases your risk of slips, trips and falls.
Lifting is more of a risk when it is:
Heavy.
Frequent.
Awkward: too low, too high, or too far away.
To reduce risk from lifting and carrying, can you:
Reduce unnecessary lifting?
Use equipment to lift for you?
Use conveyors, carts and hand trucks instead of carrying?
Store items close to where you use them?
To reduce the weight of the lift, can you:
Use smaller boxes, bins or sacks?
Only fill boxes, bins or sacks part way?
Take smaller amounts at one time?
To make the lift less awkward, can you:
Store heavier or more frequently used items at waist level?
Keep items at waist level once you’ve lifted them?
Leave space around pallets so that you can get to all sides?
Use scissor lifts or spring platforms to raise the load?
Use rolling stairs to access high shelves?
Plan the lift, evaluate the load before lifting:
How heavy is the item I’m lifting?
Where am I going with it?
Is there a clear path between where I’m picking it up and where I’m putting it down?
How many times do I have to lift the same item?
What steps can be eliminated?
How many items do I have to lift and carry?
Can I use a cart or hand truck instead?
If you do have to lift, use good technique:
Bring the object close to your body before lifting, and keep it close.
Don’t put items on the ground if you don’t have to.
Keep them at waist level.
If you do have to lift from the ground, bend at the knees and the hips, not the back.
Lift slowly and smoothly.
Don’t rush or jerk.
Don’t twist as you lift.
Move your feet instead.
Don’t overload yourself.
Get help if something is large, heavy or bulky.
If you can, use a cart, hand truck, or something else with wheels to move something instead of carrying it.
To make pushing and pulling easier, can you:
Reduce the weight of the cart and the load on it?
Push instead of pull, so that you can use larger muscles to move the load?
Maintain wheels and bearings so they roll smoothly?
Use larger diameter wheels that roll more easily?
Fix cracks and gaps in floors so that wheels don’t get caught?
Use powered equipment?
Warning signs that may signal a muscle or joint injury:
Muscle fatigue or aching that does not go away over time.
Numbness in any part of your body.
Burning or tingling sensations.
Muscle stiffness.
Loss of flexibility or range of motion.
Pay attention to warning signs and do what you can to avoid injury. Don’t assume that you can “just work through it.” Tell your supervisor if you are experiencing symptoms.
You may have ideas for ways to do your job safer, easier or faster. Talk to your supervisor about your ideas for improving your job.
PART 16 Working Safely with Livestock
The safety of employees while handling livestock is crucial. Animals are unpredictable and prone to react differently in stressful situations. Regardless of the circumstances, it is up to the persons directly affected to use their best judgment.
To prevent injuries from handling livestock, it is important to follow a few basic animal handling practices.
Move livestock slowly and patiently.
Avoid making quick movements or loud noises, which may startle livestock.
Always have an exit strategy or escape route planned, especially when working in close quarters.
Avoid approaching livestock from an animal’s blind spot or startling an animal; make it aware of your presence before getting too close.
Avoid pressuring an animal into an unfamiliar situation without sufficient personnel on hand.
Recommended Clothing and PPE
Recommended clothing while working with livestock should include long pants, enclosed shoes (stirrup safe, if riding a horse), and a short-sleeved shirt. These items are to be well fitted, not loose or baggy, so as to prevent snagging or entrapment.
Livestock Behavior
When working with livestock, it is important to know about animals’ characteristics and natural behavior:
Always be cautious when approaching livestock. Even though personalities in individual animals can vary, the natural instincts of a breed or species of animal are a good indicator of how an animal will react in a given situation.
Cattle are creatures of habit. They enjoy repetition with little to no change. Any time a cow is moved, treated or exposed to new things, that animal’s habitual lifestyle has been disrupted, causing it more stress.
Aggression in cattle is most often seen with bulls and new or expecting mothers. Use extra caution when dealing with cattle that are showing signs of aggression. Never let an aggressive animal out of your sight.
Pay extra attention to your escape routes.
Call for back-up to help with aggressive, stressful animals.
Sight
Unlike humans, cattle have almost a full 360 degree view of their surroundings. This increases their opportunity of being distracted by a person, piece of equipment or movements around them. Even though cattle have a wide range of view, there is a blind spot directly behind them.
Approaching cattle from the side rather than directly from behind will reduce the chances of startling the animal.
When working directly or indirectly with cattle, it is important to move slowly.
Hearing
Cattle have great hearing, but in a busy feedlot full of distracting noises, cattle can become preoccupied with a feed truck or pickup driving by.
When approaching an animal where it is visually apparent that it is unaware of your presence, it is best that to stop the approach until making certain you have the animal’s attention.
Flight Zone
All animals have a comfort zone or flight zone. The size of this zone depends on the tameness of each individual animal. If the animal handler is outside of the flight zone, the animal is comfortable. When he or she enters the flight zone, the animal becomes uncomfortable and moves away.
Move in a quiet and easy manner to keep cattle calm.
Slowly enter the flight zone at a 45 or 60 degree angle to cause the cow to move forward.
Physical Hazards
Some of the main physical hazards come from gates, hydraulic chutes, taggers, needles and other items in the physical environment.
Gates: When shutting a gate behind cattle, make sure that it is free of livestock. Do not push livestock with the gates.
Hydraulic chutes: Prior to set-up, identify who will operate the chute and which areas are off limits while processing livestock.
Shadows: Shadows can cause cattle to balk and increase the difficulty of handling. Be aware of shadow areas and look for ways to eliminate or reduce them.
Walking surfaces: Surfaces vary greatly, from dirt to concrete. Employees need to adjust their speed of cattle movement depending on weather and walking surfaces, and avoid running when slick or muddy.
Electric Fence: While working cattle on foot or horseback around hot fences, always have an exit strategy or escape route in the event the cattle get frightened or become aggressive.
Sharp Hazards: Taggers and needles are used while processing cattle. When handling these devices make sure to follow these simple safety tips.
--Wear rubber gloves.
--Maintain a firm wrist.
--Point the sharp end away from body at all times.
--Maintain a solid footing, feet squared to the animal and firmly planted.
--Before administering medication, restrain the animal in a squeeze chute.
--Dispose of needles in sharps containers.
Horses
Using horses increases the efficiency and safety of the cowboys as they inspect cattle, searching for sick animals. Horses, just like cattle, have personalities and natural instincts. While handling a horse, make sure to pay attention to its level of comfort around cattle. Stay away from electric fences and falling hazards such as rocks, concrete, and sharp edges.
PART 17 Confined Spaces
Never enter a confined space to do work or rescue someone unless you have the proper training and equipment to make a safe entry into the space.
Every year workers die or are injured in confined spaces due to a variety of hazards that can suffocate, engulf, electrocute or harm them in other ways. Would-be rescuers also die or are injured in confined spaces because they do not have the proper training or equipment to rescue someone that went inside the space.
Tanks, storage bins, utility vaults, pits and many other commonly encountered agricultural work spaces are classified as confined spaces. These spaces are large enough to accommodate workers, but aren’t primarily designed for continuous employee occupancy and offer limited means for entry or exit.
Part 17A – Common Confifined Spaces
The following commonly encountered confined spaces in agriculture are only a sample of work areas that can pose a danger to workers if potential hazards are not identified and controlled prior to entry:
Controlled atmosphere (CA) storage rooms: Can contain hazardous atmosphere.
Manure pits: Can contain hazardous atmosphere, drowning and mechanical hazards.
Wine storage tanks: Can contain hazardous atmosphere and mechanical hazards.
Food and chemical processing and holding tanks: Can contain hazardous atmosphere, pressurized lines, electrical, flammable and mechanical hazards.
Grain bins: Can contain hazardous atmosphere, engulfment and mechanical hazards.
Storm drains and underground irrigation siphons: Can contain hazardous atmosphere and drowning hazards.
Fumigation areas: Can contain hazardous atmosphere.
Part 17B – Definitions
Identifying and documenting the confined spaces in the workplace is the first step to protecting people who might enter a space to do work. All spaces must be assumed to be “permit-required confined spaces” unless a determination is made and documented that the space is a non-permit confined space.
A permit-required confined space or permit space is a confined space that has one or more of the following characteristics capable of causing death or serious physical harm:
Contains or has a potential to contain a hazardous atmosphere.
Contains a material with the potential for engulfing someone who enters the space.
Has an internal configuration that could allow someone entering to be trapped or asphyxiated by inwardly converging walls or by a floor that slopes downward and tapers to a smaller cross-section.
Contains any physical hazard. This includes any recognized health or safety hazards — including engulfment in solid or liquid material, electrical shock or moving parts.
Contains any other recognized safety or health hazard that could either:
--Impair the ability to self-rescue; or
--Result in a situation that presents an immediate danger to life or health.
A non-permit confined space is a confined space that does not contain actual hazards or potential hazards capable of causing death or serious physical harm.
Part 17C – Entry Procedures
Having a plan to safely enter confined spaces is important to help people know about the potential hazards of a space and how to control the hazards. A written permit-required confined space program will document the hazards of the space and safe entry procedures, and it will form the basis for training workers who will perform tasks in and around permit-spaces.
Identify and evaluate the hazards of permit-required confined spaces and the work performed, to assist you in developing your entry program.
Develop a written program, before employees enter, that describes the means, procedures and practices you use for the safe entry of permit required confined spaces as required by this part. Include the following when applicable to your confined space entry program:
Documentation of permit entry procedures.
Documentation used for alternate entry procedures.
How to reclassify permit-required confined spaces to non-permit spaces.
Designation of employee roles, such as entrants, attendants, entry supervisors, rescuers or those who test or monitor the atmosphere in a permit-required space.
Identification of designated employee duties.
Training employees on their designated roles.
How to identify and evaluate hazards.
Use and maintenance of equipment.
How to prevent unauthorized entry.
How to coordinate entry with another employer.
How to rescue entrants.
Some methods for controlling confined space hazards include ventilation, machine guarding, lockout/tagout and draining liquids or solids from the space.
Entry permits documenting hazards and safe entry procedures must be used each time work will occur inside of a permit-required confined space.
PART 18 Resources
Knowing the resources to help create a safe and healthy workplace is essential. When reviewing this pocket guide, you may find a need for more information about specific rules, training materials and how to receive assistance in developing a safe workplace.
Part 18B – How to File a Safety and Health Complaint
If an employee believes a safety or health hazard exists in the workplace, they have the right to file a complaint: www.Lni.wa.gov/Safety/Basics/Complaint.
Employees should try to correct the safety or health hazard with their employer before filing a complaint.
Upon request, foreign language support and formats for persons with disabilities are available. Call 1-800-547-8367. TDD users, call 360-902-5797. L&I is an equal opportunity employer.
PUBLICATION F417-255-000 [06-2015]
Disclaimer and Reproduction Information: Information in
NASD does not represent NIOSH policy. Information included in
NASD appears by permission of the author and/or copyright holder.
More

 When calling 911, give the dispatcher the following information and remain on the phone until information is confirmed and the dispatcher says to hang up.
 Make sure emergency washing facilities are functional and readily accessible.
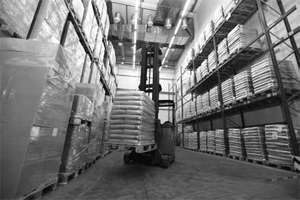 Remove debris from the job on a regular basis.
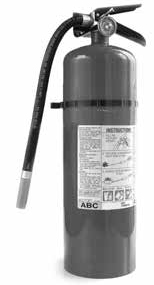 Things to remember:
 Monthly safety inspection
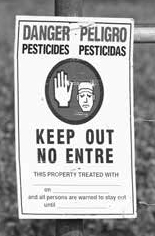 Using pesticides for growing plants can create safety and health risks for workers and others around the workplace. However, following safe work practices and good training can reduce the risk of injury or illness to people from pesticides.
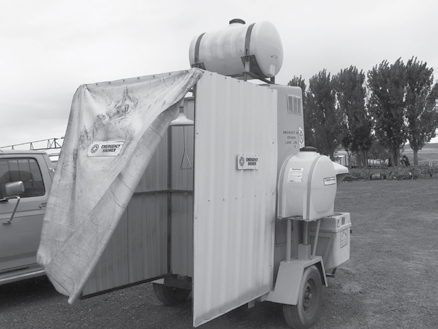
 Tractors, chainsaws, power pruners, air compressors, landscaping equipment and processing machinery are some types of equipment that can create noisy work environments. High noise levels can result in long-term health effects, such as hearing loss, permanent ringing in the ears (tinnitus) and even high blood pressure.
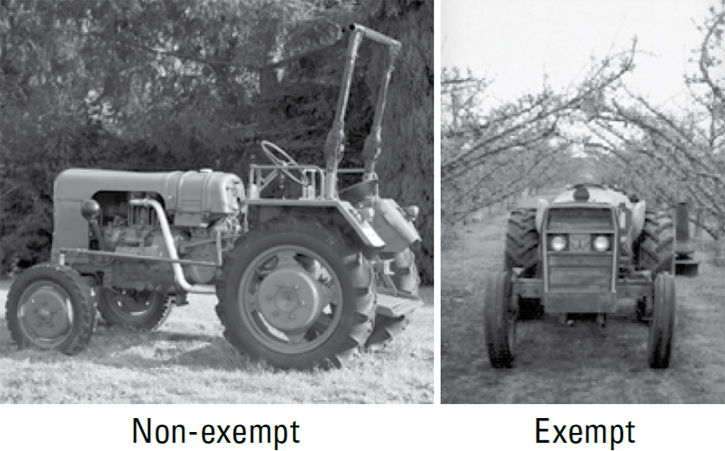
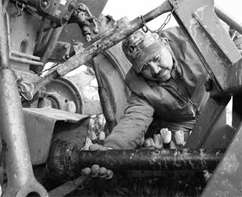
 All-Terrain Vehicles (ATV) and Off-Road Vehicles (ORV) can be an efficient and economical substitute for pick-up trucks, horses, tractors and even walking in many agricultural and industrial operations. They are used to inspect crops, livestock and check irrigation, and by farm supervisors in the field. They are found on all types of farms, ranches, groves, forestry operations, nurseries, greenhouses and other operations.
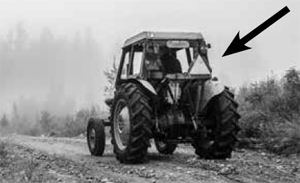
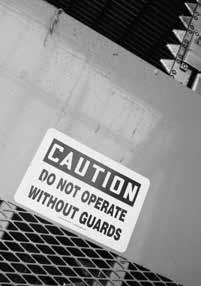 Guards on a machine: A barrier that prevents the hands or other body part from reaching through, over, under or around the guard into the hazard area. A guard prevents objects or debris from falling onto or being ejected towards an employee.
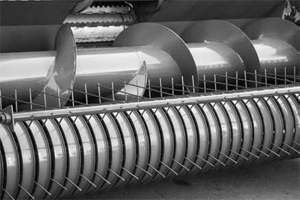
 Before Operations
 One or more “stop” buttons (red or orange) must be provided on the machine within reach of the operator.
 Mount the safety guard so it maintains proper alignment with the wheel, and use fasteners strong enough to keep the guard in position if a wheel breaks.
 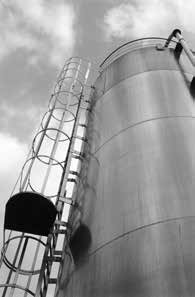 A fixed ladder must be capable of supporting at least two loads of 250 pounds each, concentrated between any two consecutive attachments. Fixed ladders also must support added anticipated loads caused by ice buildup, winds, rigging and impact loads resulting from the use of ladder safety devices.
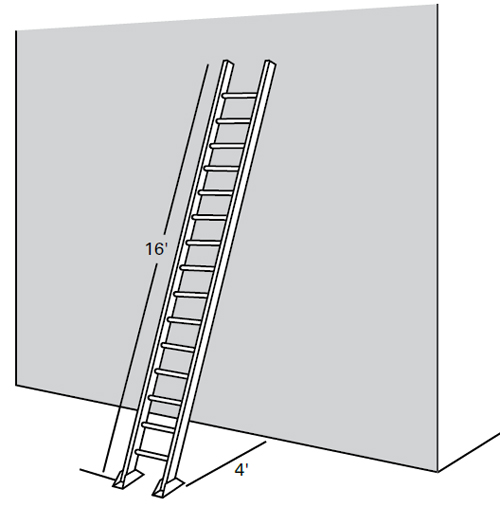


 Water is in locations that are accessible to all employees.
 All farm tractors and other slow-moving farm vehicles and equipment used on public roads are required to have lamps, reflectors, and a slowmoving vehicle emblem. From one-half hour after sunset to one-half hour before sunrise, slowmoving vehicles must have lights and reflectors.
  If the work is too high, can you:
  To reduce risk from lifting and carrying, can you: